How To: change your motorcycle chain (2009 Suzuki V-Strom 650)
Are you ready to make your pointy hat just a little bit taller (and your tool chest a little bit fuller)? Good, because we’re about to do one of the more labor-intensive bits of routine bike maintenance: changing out a worn chain and sprockets.


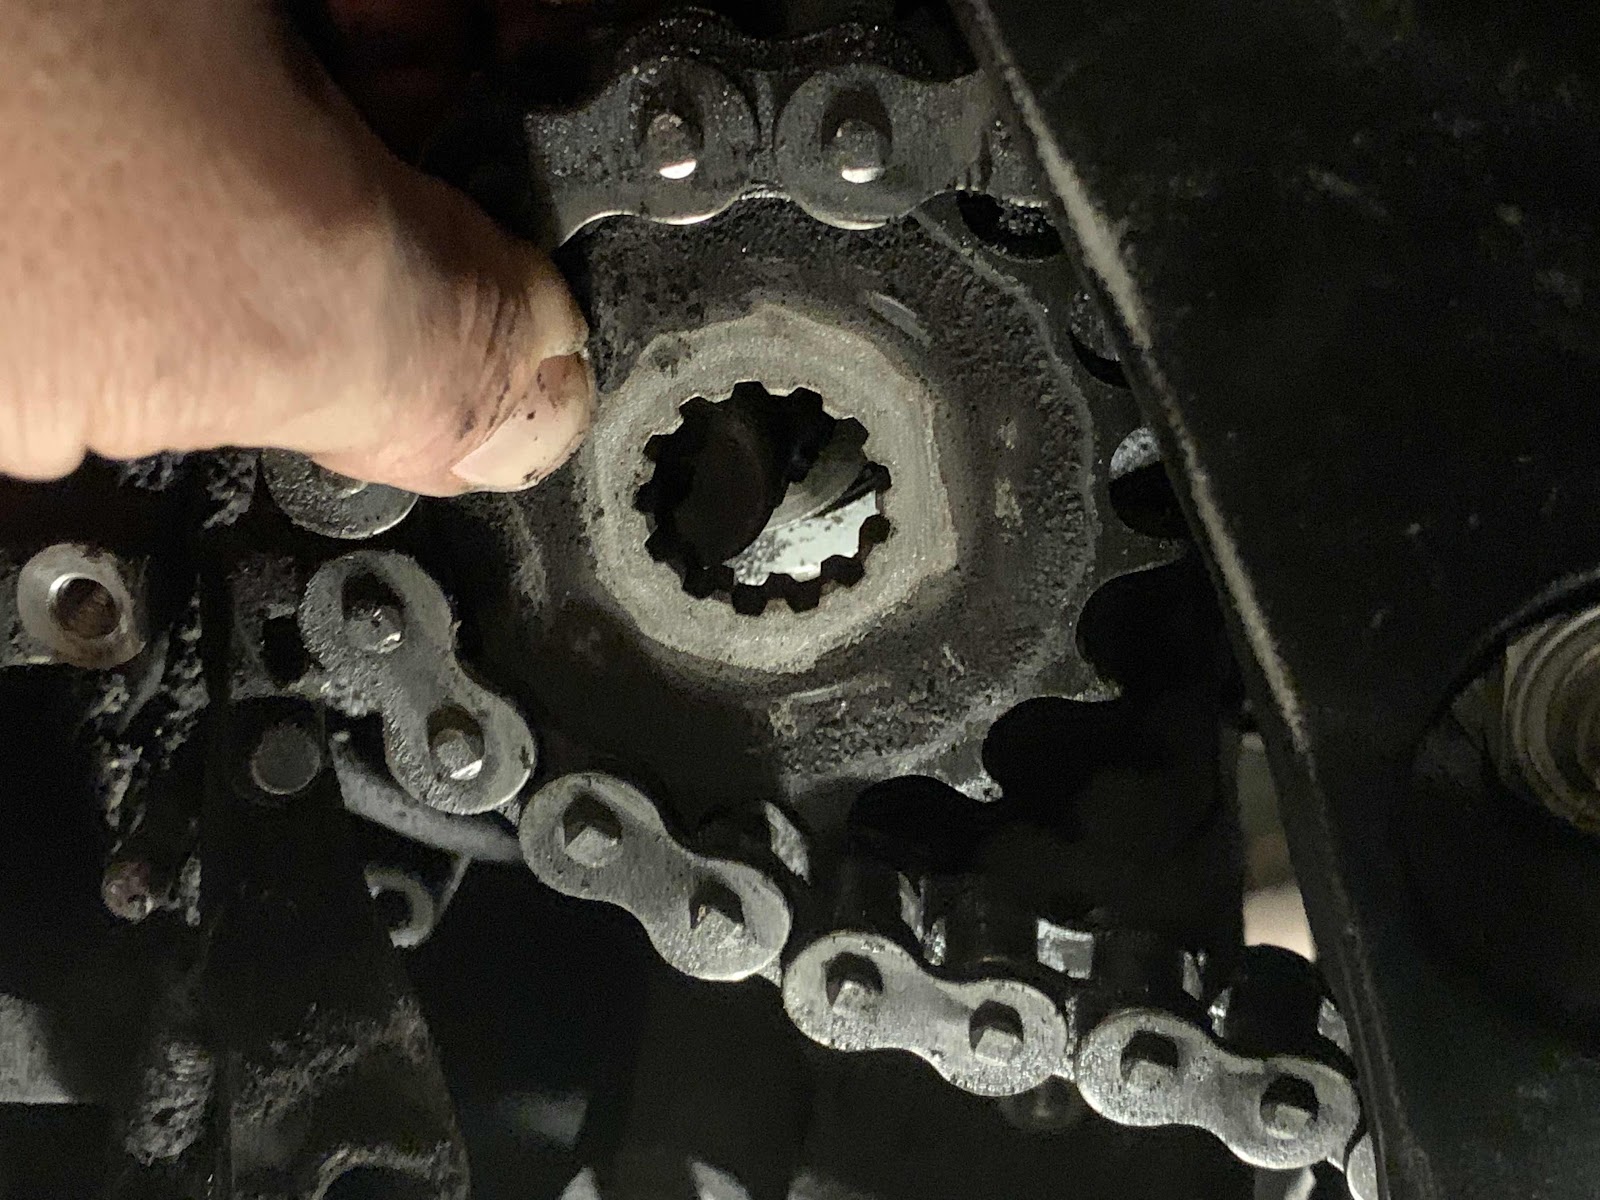
Step 2a: now you can inspect the front sprocket and see how much damage it has incurred since the last time you checked, which let’s be honest was probably ages ago, since getting that sprocket cover off is such a hassle.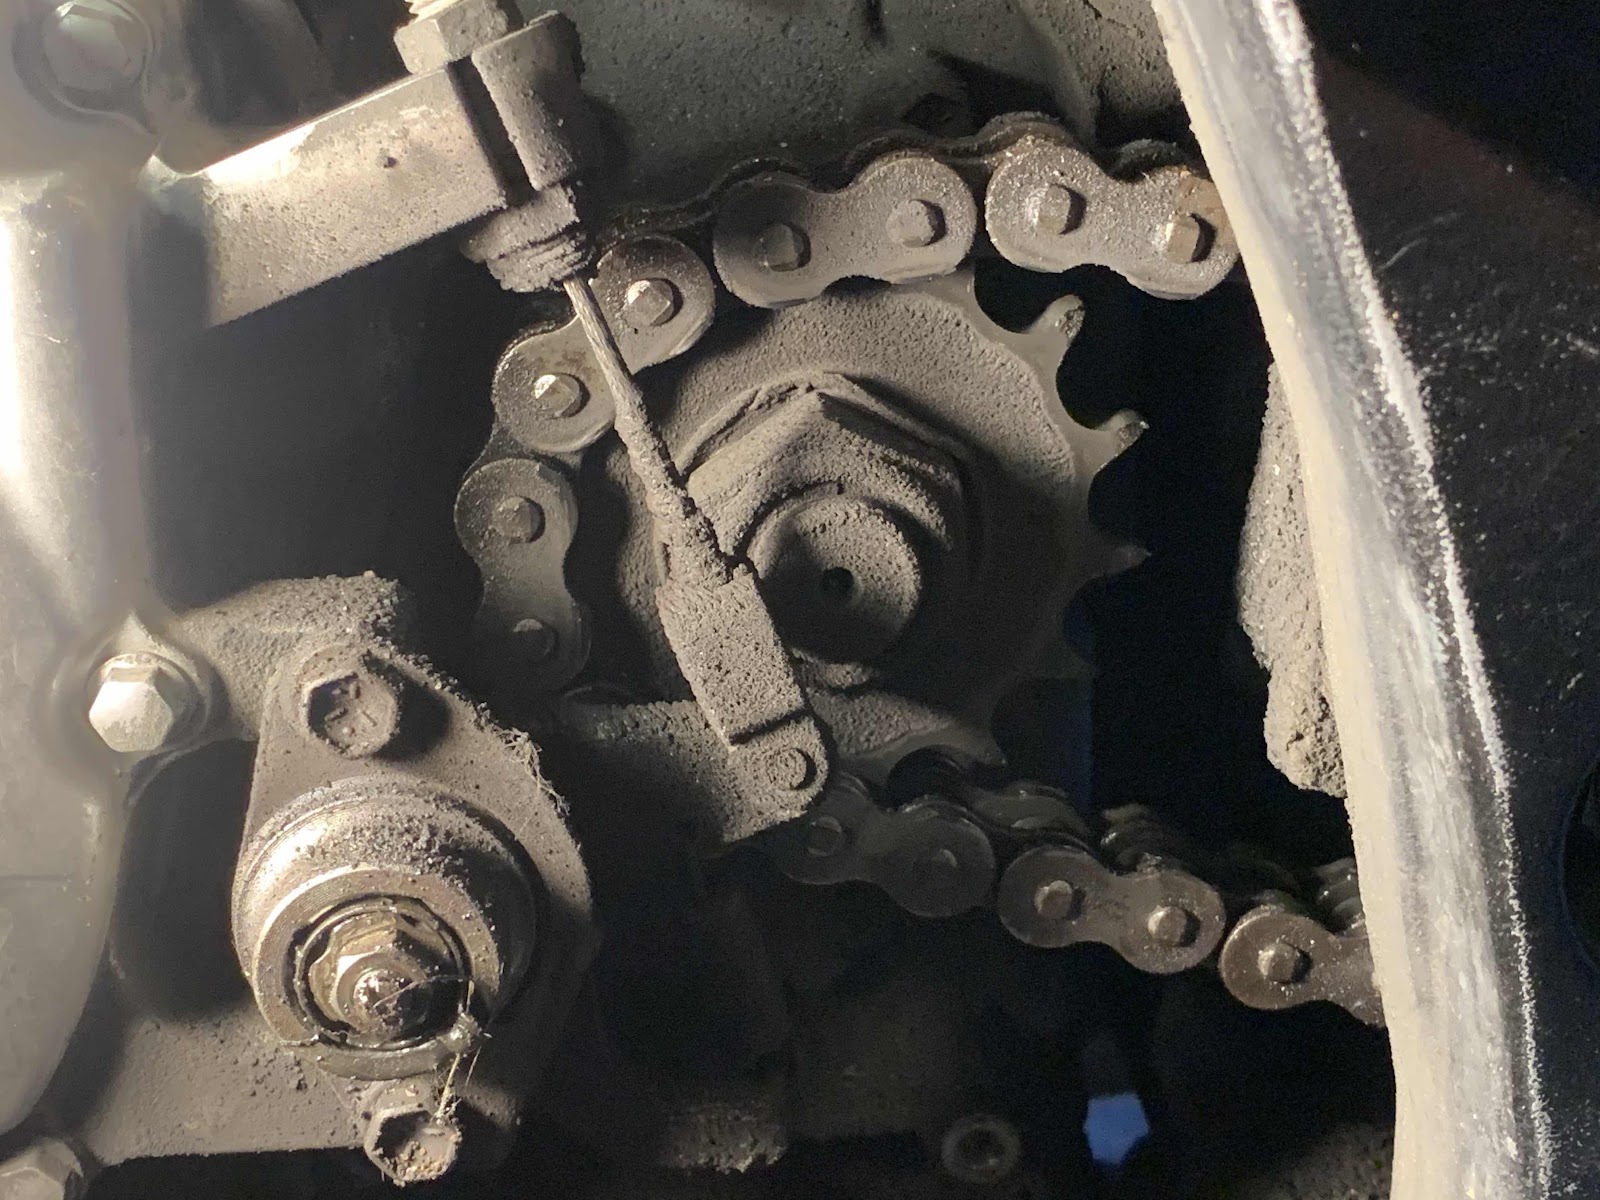
Pretty ugly, huh? Thus is, for one thing, possibly the dirtiest place on the whole bike, what with all the dirty chain line being sling around in there. But even worse are all of those hooked sprocket teeth. Yup, that sucker needs to be replaced.


Not shown here is the metal rod behind the clutch mechanism that the clutch mechanism uses to push the actual clutch plate away from the gearbox. Mine was so filthy with indescribable grime that I suspect it has been hampering my shifting ability for some time. Cleaned it off thoroughly and, you guessed it, now the clutch comes all the way out when I pull the clutch lever. Imagine that!
Step 3. “Break” the bolt on the rear axle (with a breaking bar and a 24mm socket) while you still have the bike on the ground and the wheel can provide some resistance. Then put the bike up on its center stand.

Step 4a. Use a screwdriver and a hammer to flatten out the washer behind the front sprocket nut so that the nut can actually turn. I don’t recommend that you spend several minutes trying to break the bolt with the bent washer in place only to realize what an idiot you were because there is no way for it to turn like that.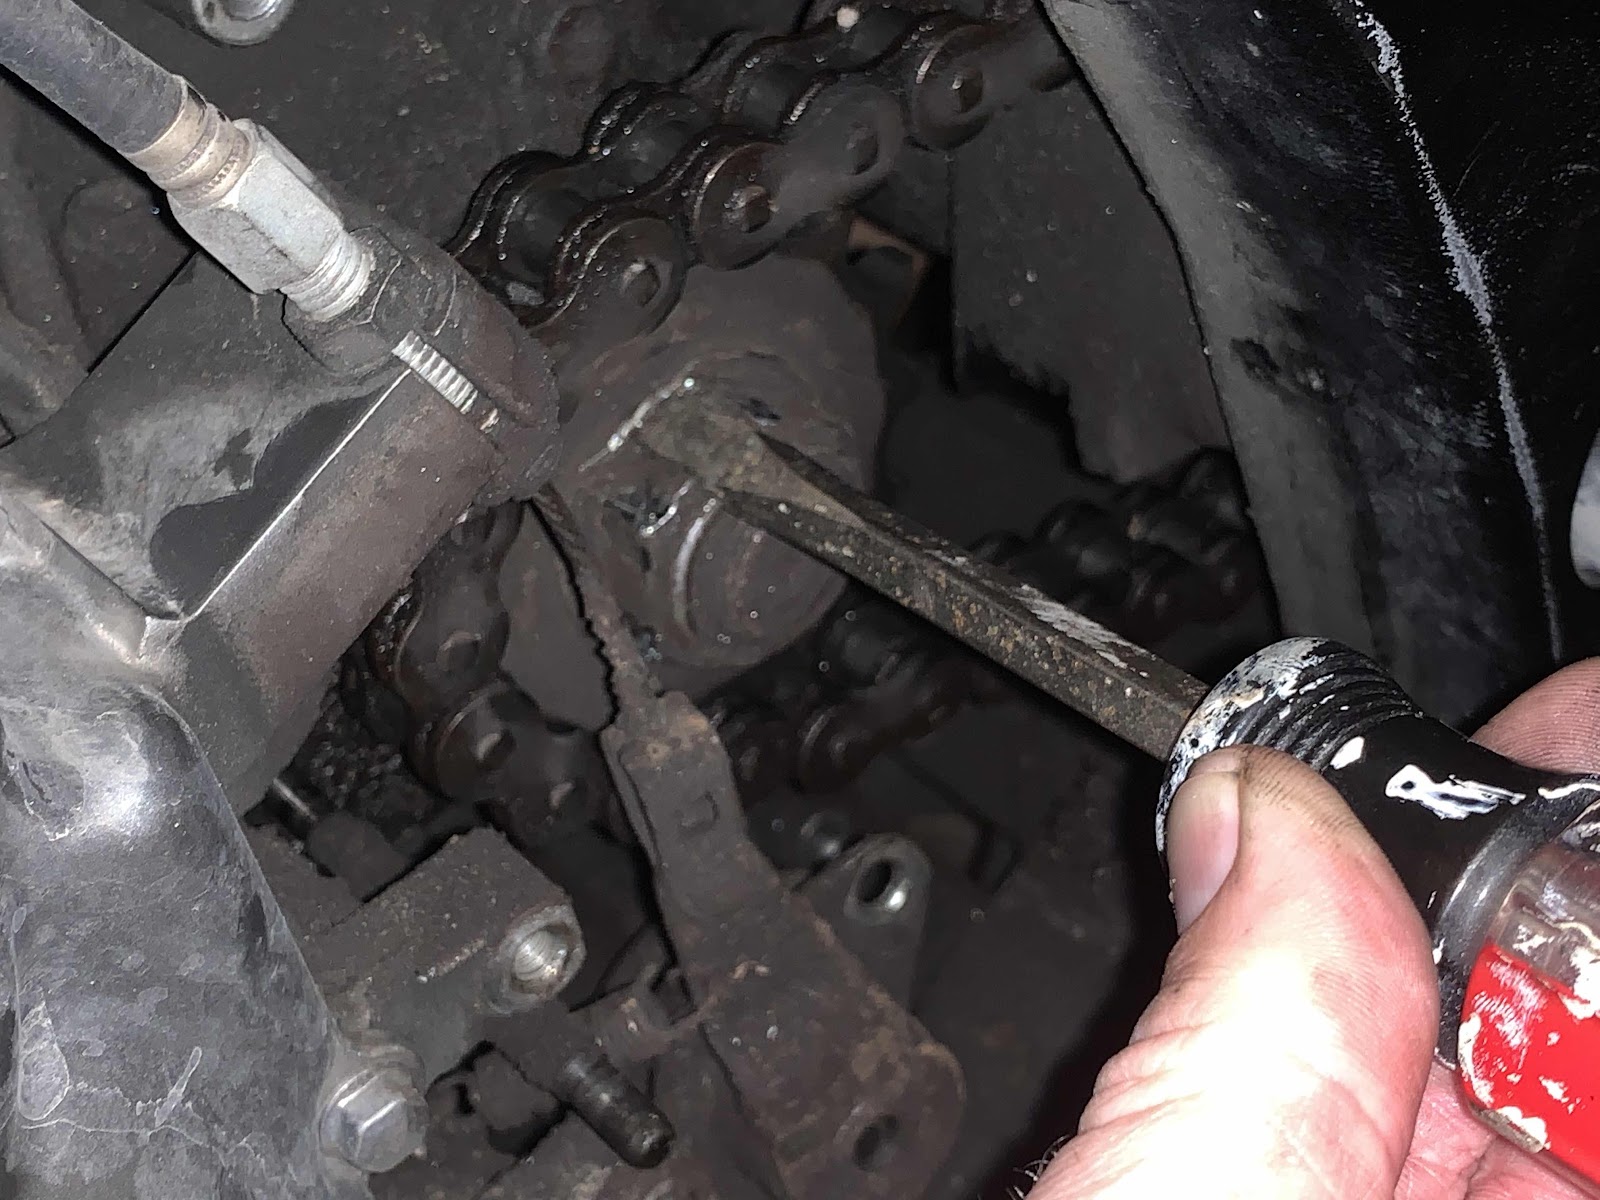
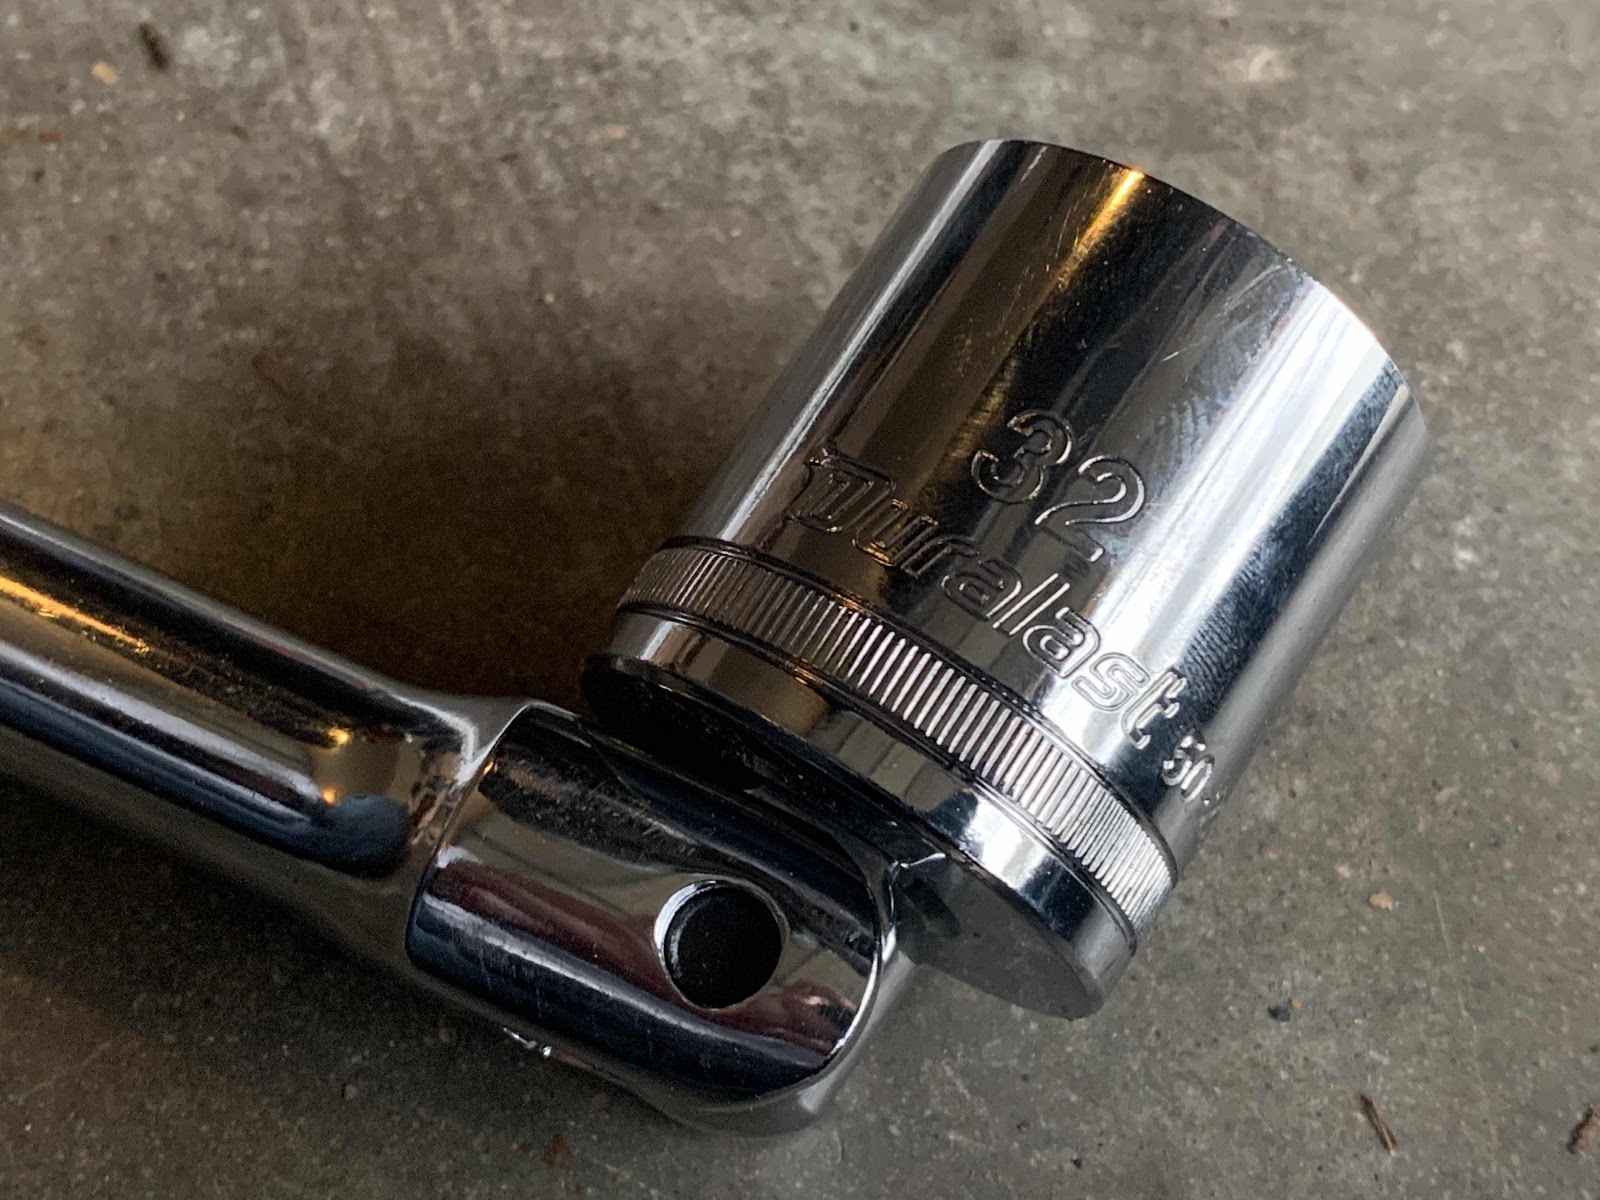
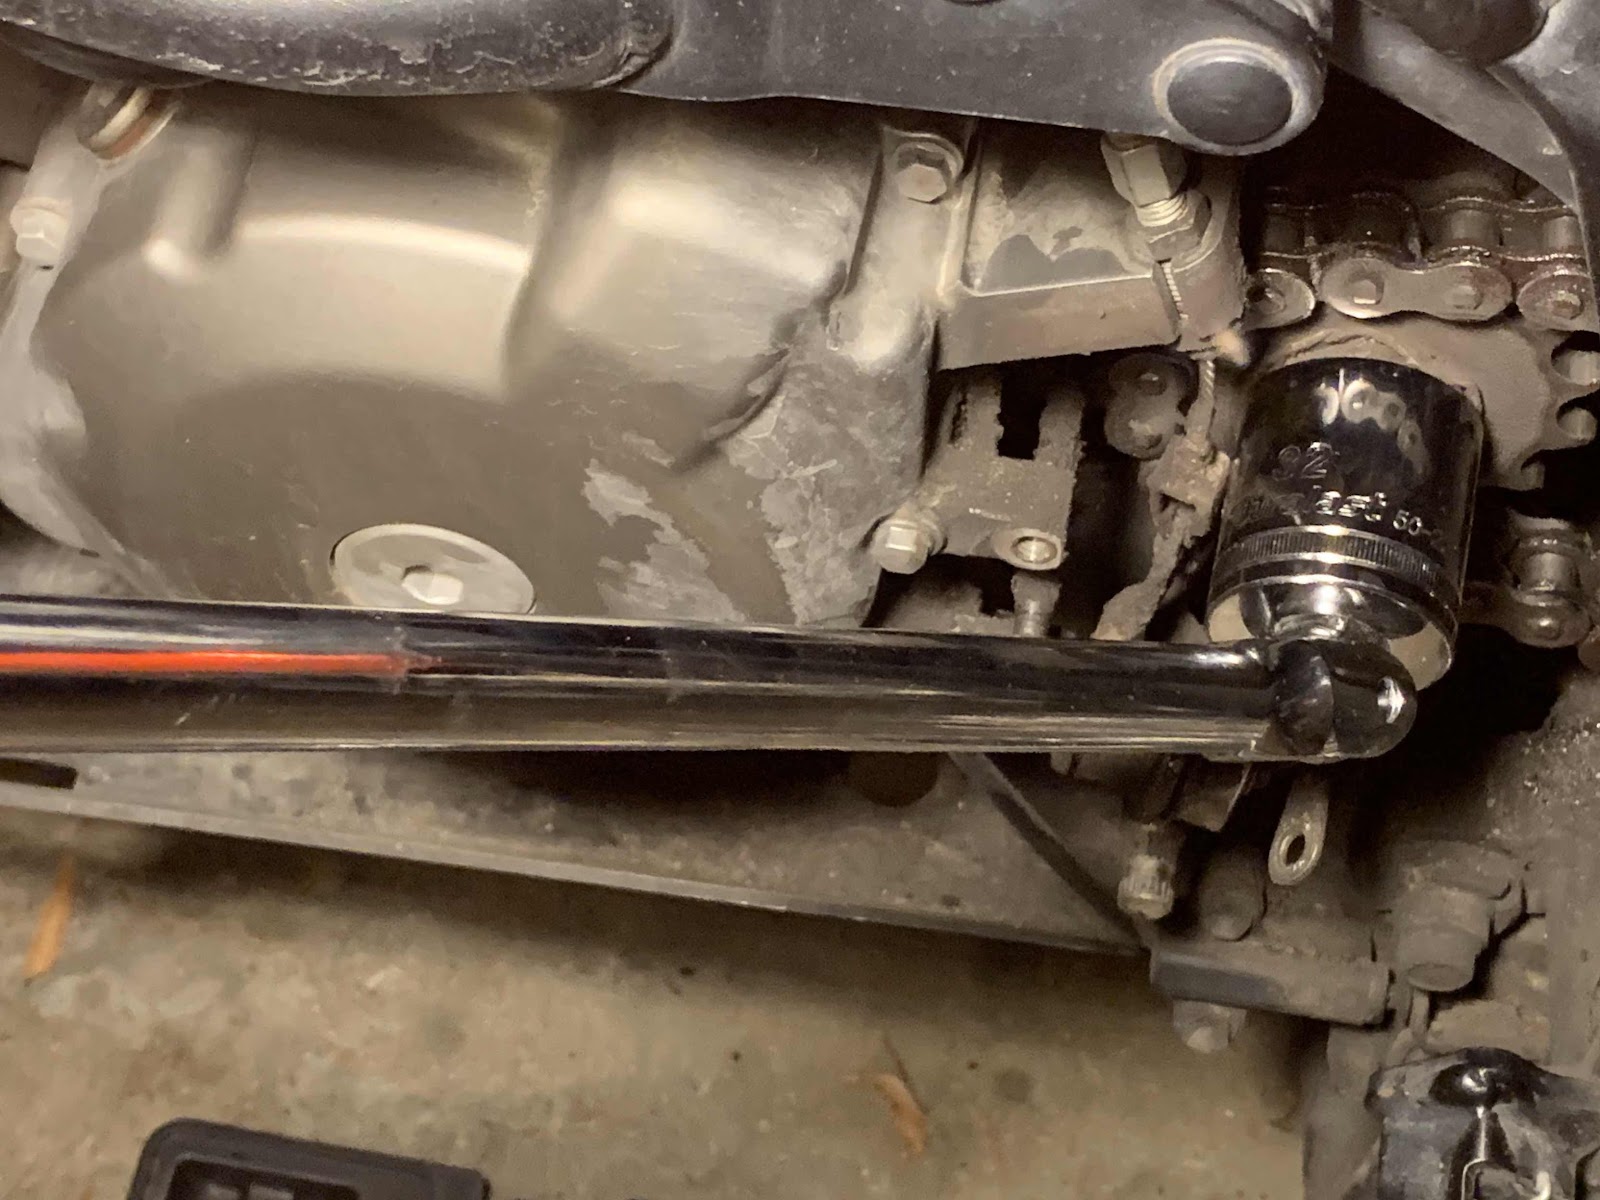
Step 4b. Attach the longest breaking bar you have available to a whopping 32mm hex socket. Attach it to the bolt as shown below. Mount the bike (still up on its center stand), and step down as hard as you can on the rear brake with your right foot while you step down as hard as you can on the breaker bar with your left. Maybe the guy who owned her before me used a bit too much Loctite or something, but that is seriously the only way I could get this bolt to budge.
Step 5. Now it is time to break the chain. You will need a chain breaking and riveting tool such as the one I got from Stockton Tool a.k.a. Cycle Gear:
Step 6. Disassemble everything.
Old chain, new chain: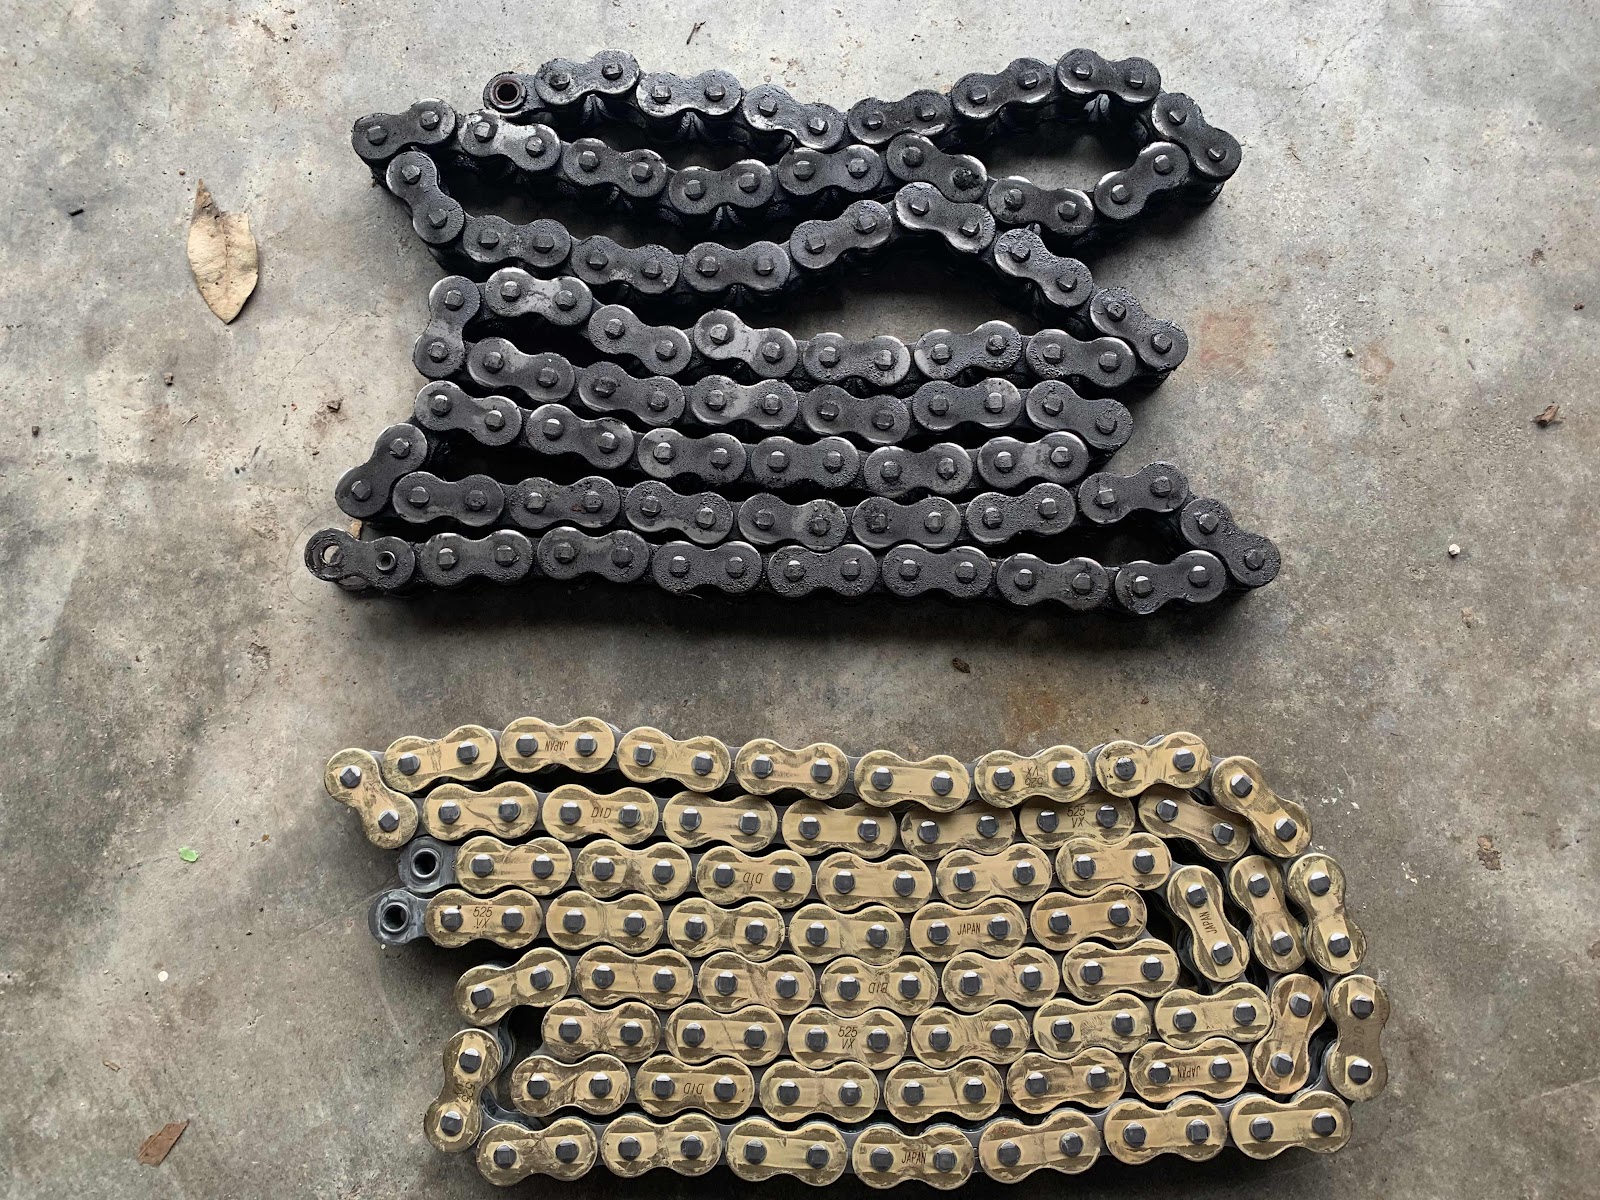
Old sprocket, new sprocket:
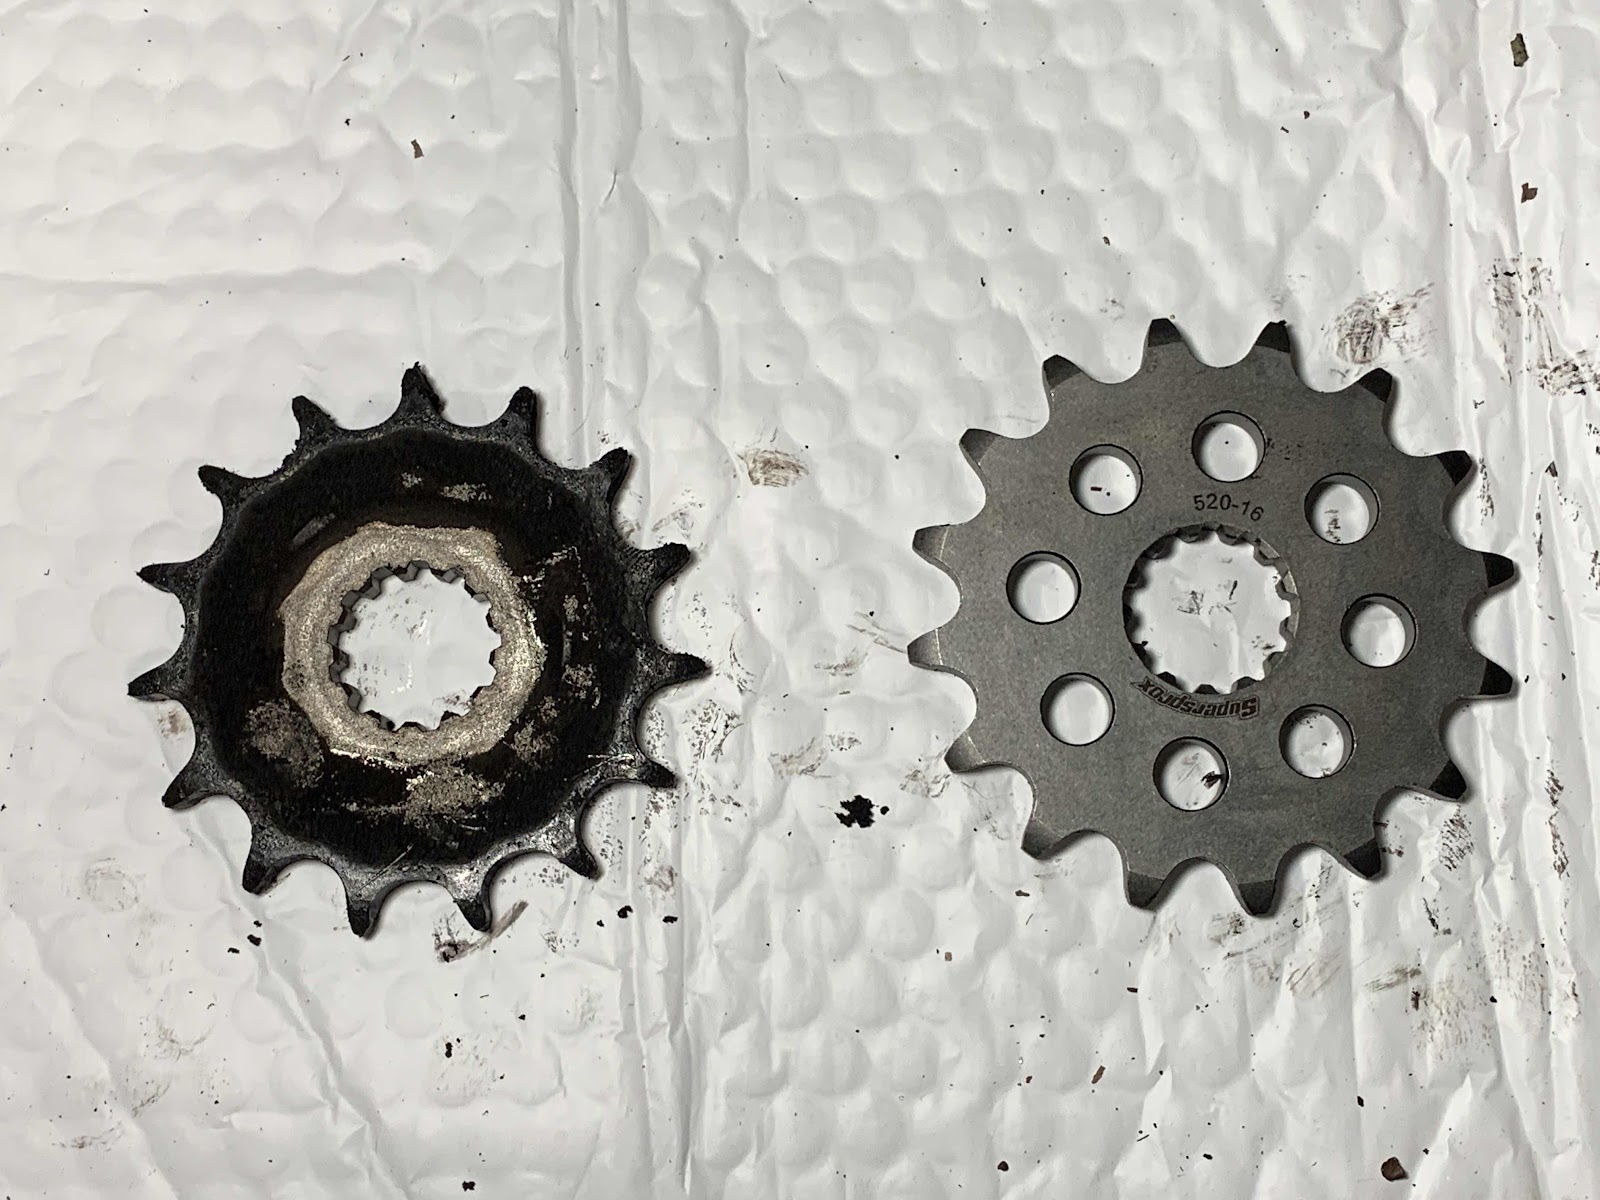
(And this is *definitely* a recommendation for SuperSprox sprockets. Also note that I “went up” one tooth in my replacement sprocket and also down a couple of teeth on the rear – best bike mod I’ve done yet, has my “wee-Strom” comfortable at interstate speeds without any noticeable loss in the acceleration department. Kinda feels like she was meant to be geared this way.)

Step 7. Change the rear sprocket: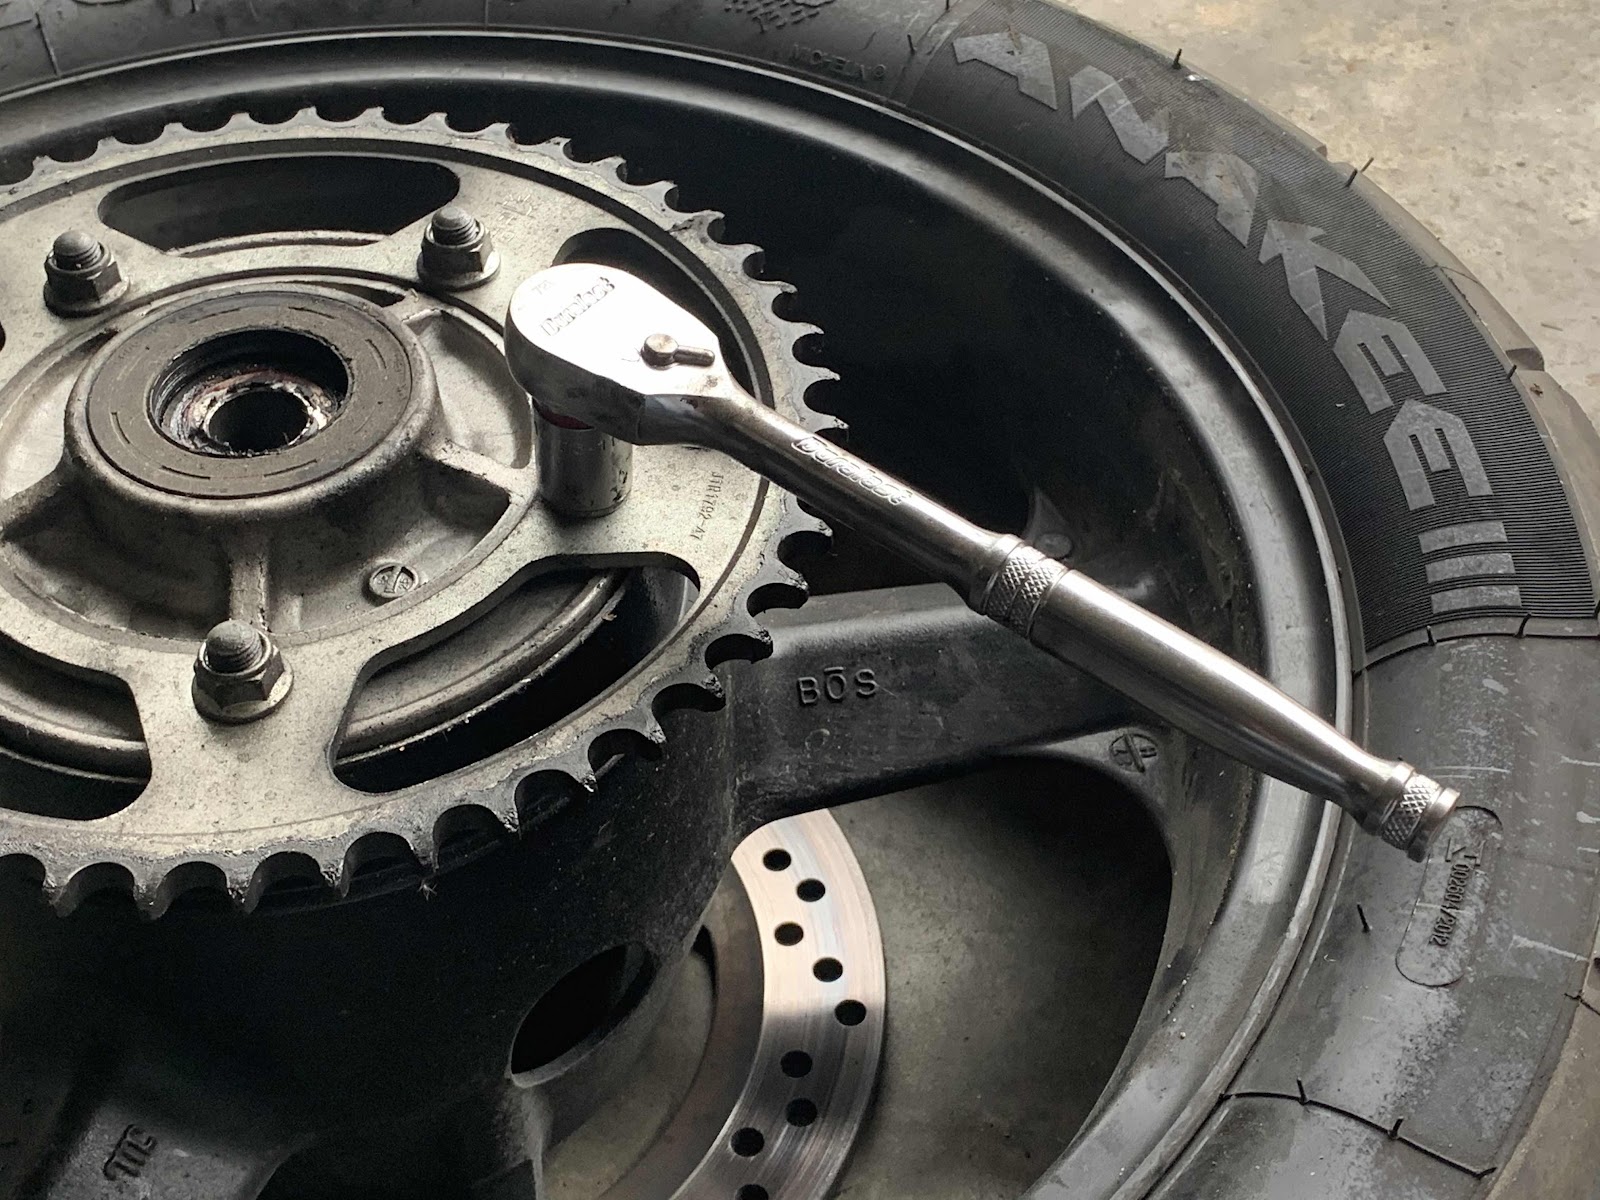


Then use the chain breaker as before to push the desired pin out:
Step 10. Assemble the “master link”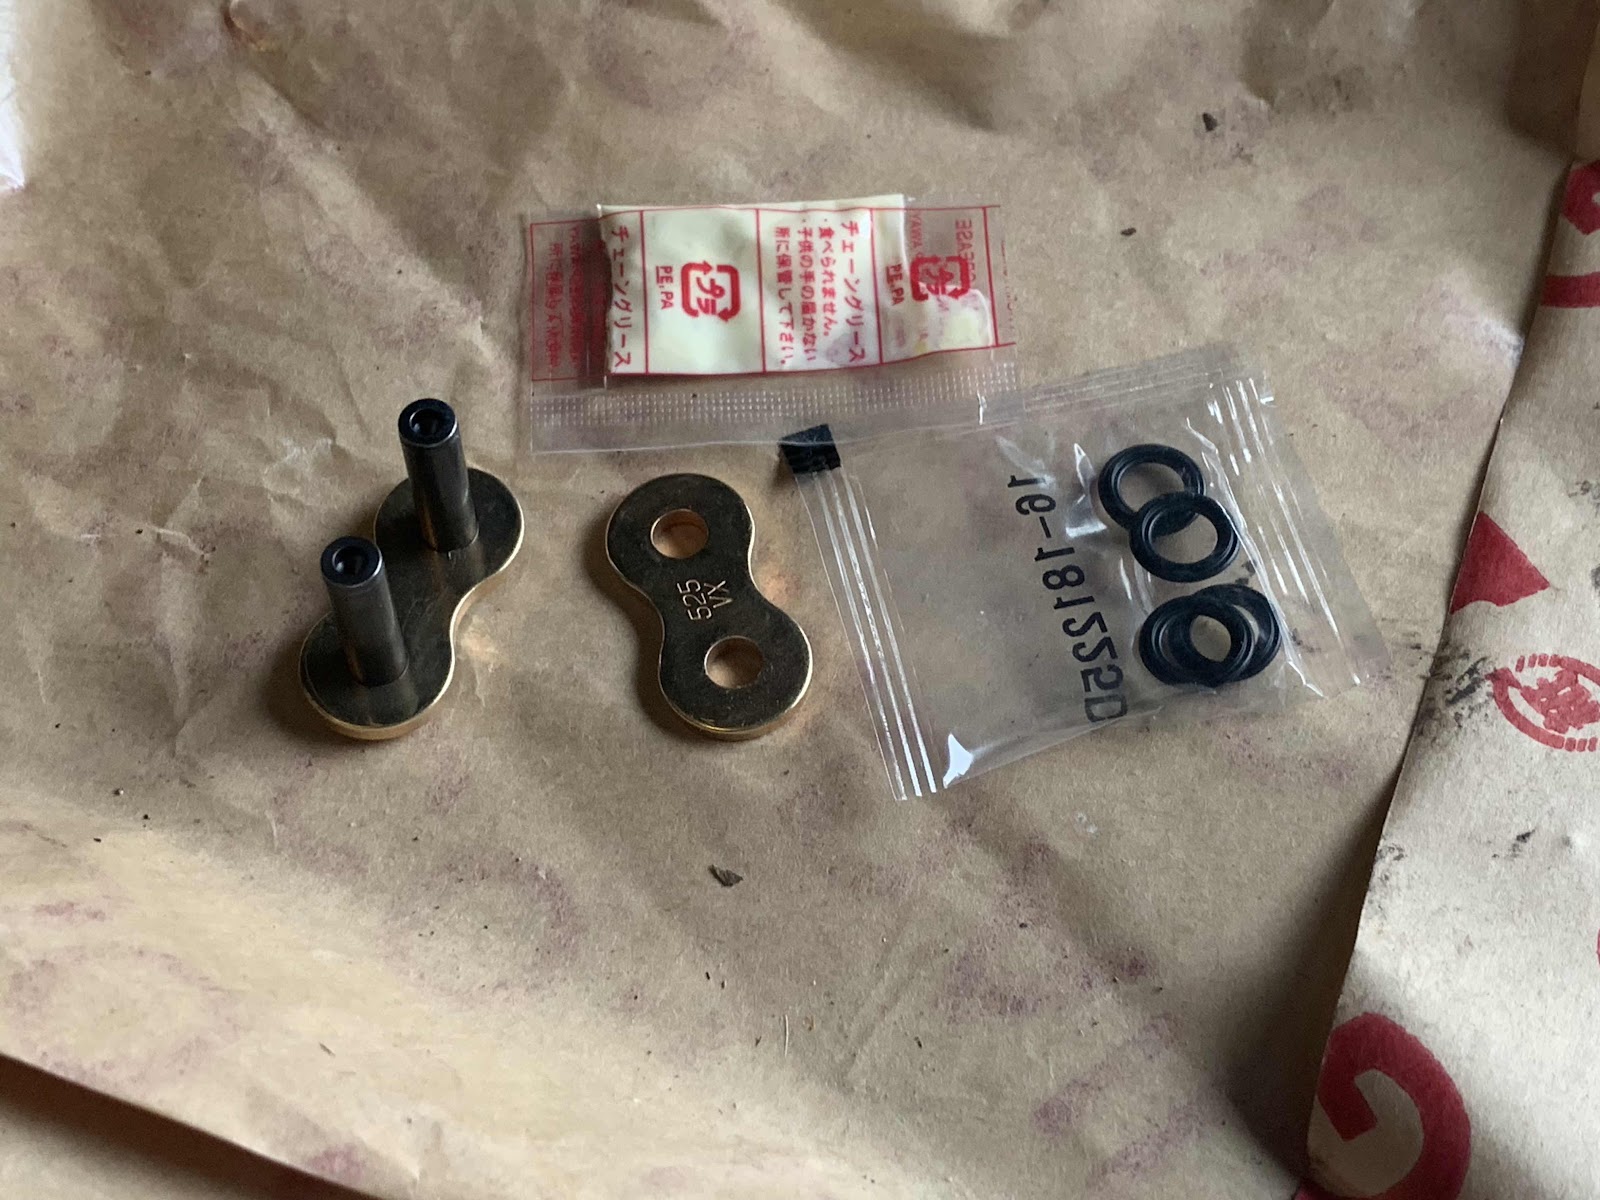
Spread chain grease all over the x-rings:

Assemble two x-rings onto the side of the master link with the posts:
Now spread chain grease all over the posts (after all, the x-rings need to have something to hold in):
Assemble the master link between the two loose ends of the chain:

Add x-rings to the bare ends of the posts:
And assemble the other side of the master link into place:


On second thought, skip that step.

Step 15. Reassemble the clutch mechanism, front sprocket cover, and gear shift lever in reverse order of the first few steps of this how-to.
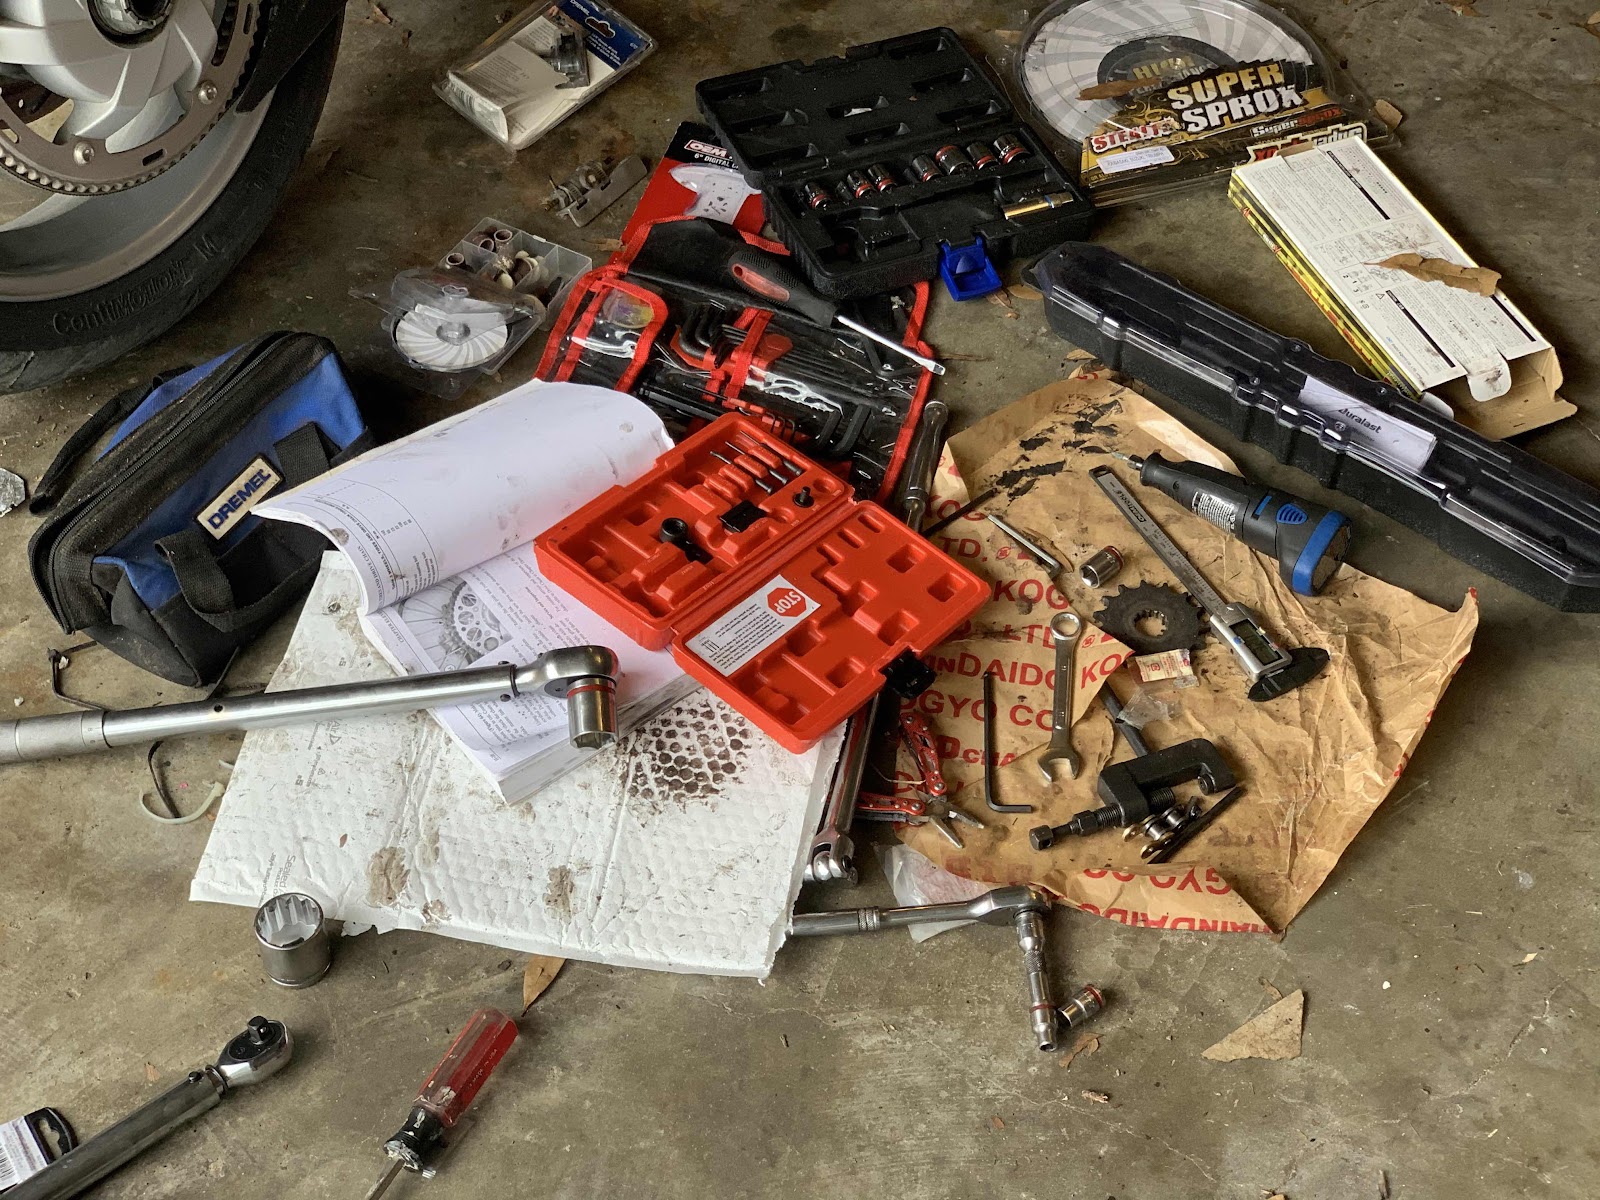
Your work space should look like this:
And your bike should look good as new:

Cheers!
First, a bit of advice I’ve collected from several places: if you have a chain-driven bike, your final drive consists of two sprockets and a chain – change them all at the same time. Even if one piece looks like it has some life left in it, a slightly-worn sprocket will accelerate the wear on a new chain or vice versa. You’ll get the longest life out of your investment (and get to spend the longest time riding your bike before you have to do this again) if you follow this advice. Okay, /soapbox.
Now, where to begin?
Step 1: You’ve got to get the front sprocket cover off the damn bike. On my bike, it’s a silly little piece of plastic that I suppose is necessary to keep one from getting their toes mangled by the whirling front sprocket. There are three screws to remove using an 8mm socket, and you will probably need an extension bar to reach the bolts, but before you can do that it helps to detach the gear-shift lever from the gear-change shaft to get it out of your way.
NB: my maintenance manual suggested that I shift the bike into gear before doing this so that the engine would help hold the sprockets in place while I “broke” various bolts. It helped with the rear axle bolt but not at all with the front sprocket bolt, which simply succeeded in moving the engine as I tried to get it loose. Worse, the engine not being in neutral made threading the old chain out and the new chain in damn near impossible, so I don’t recommend it.
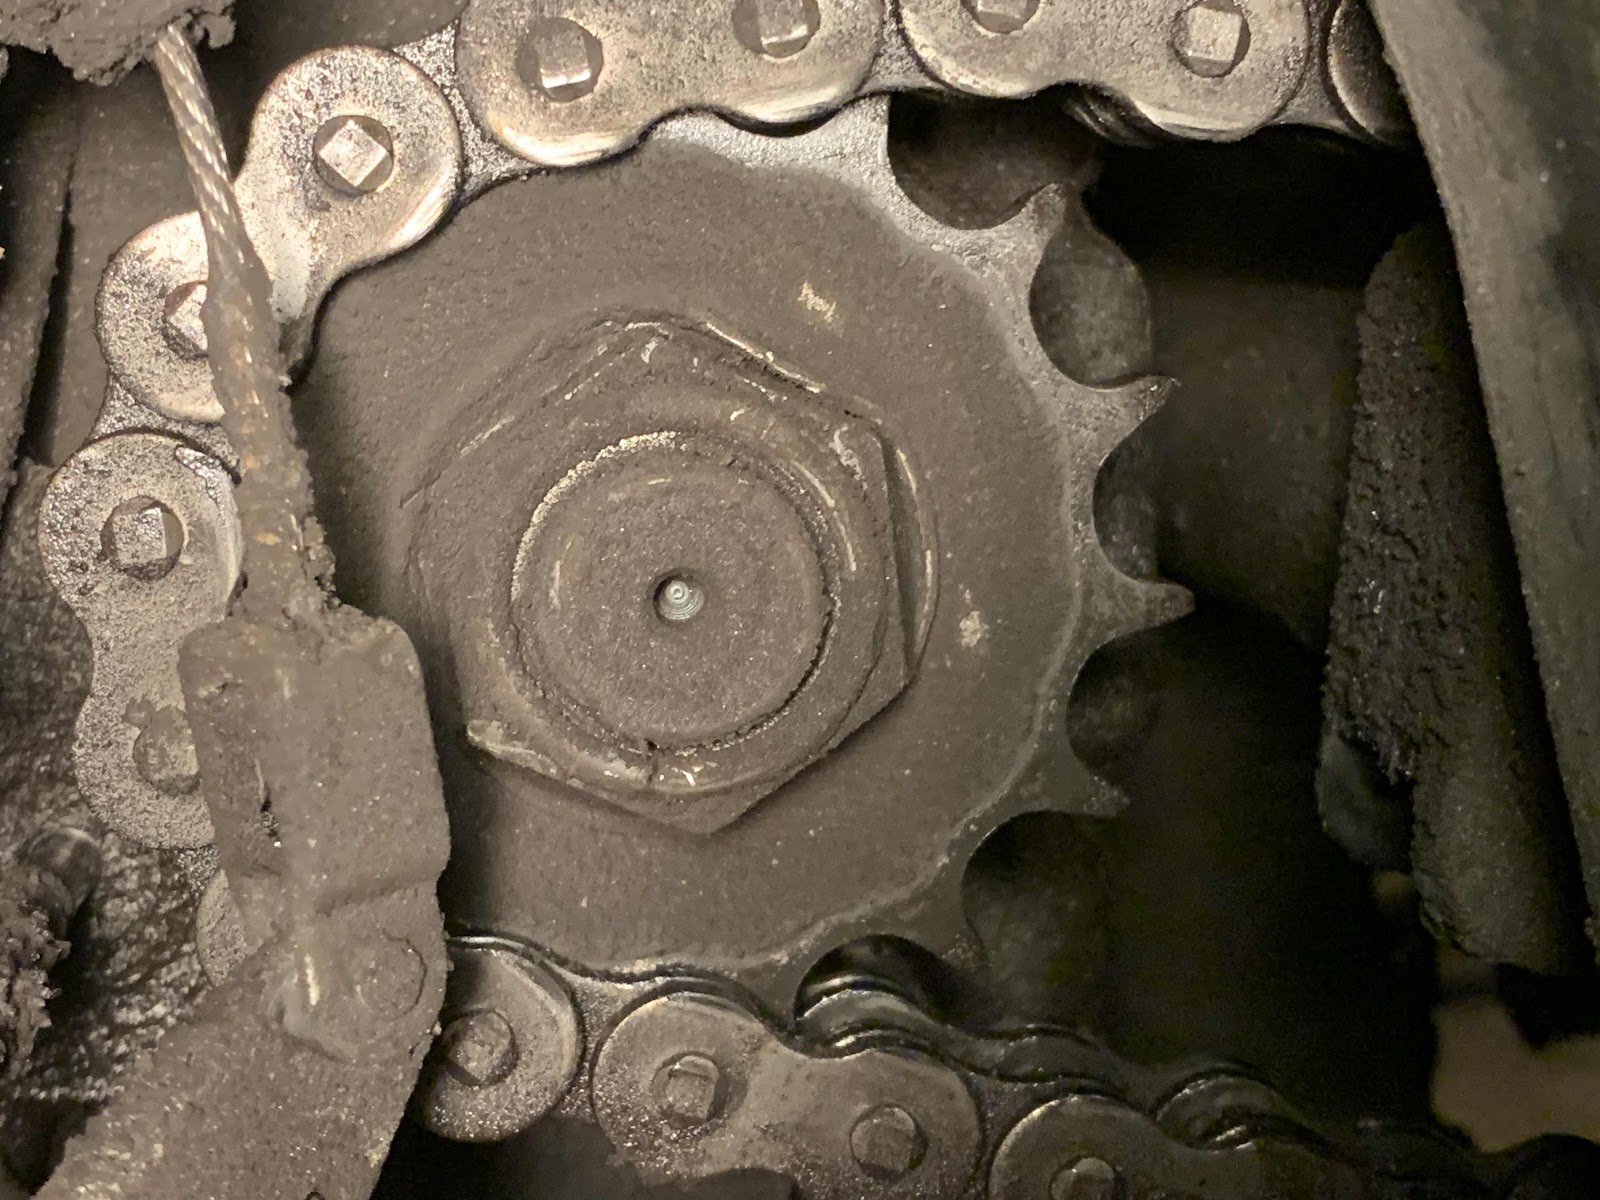
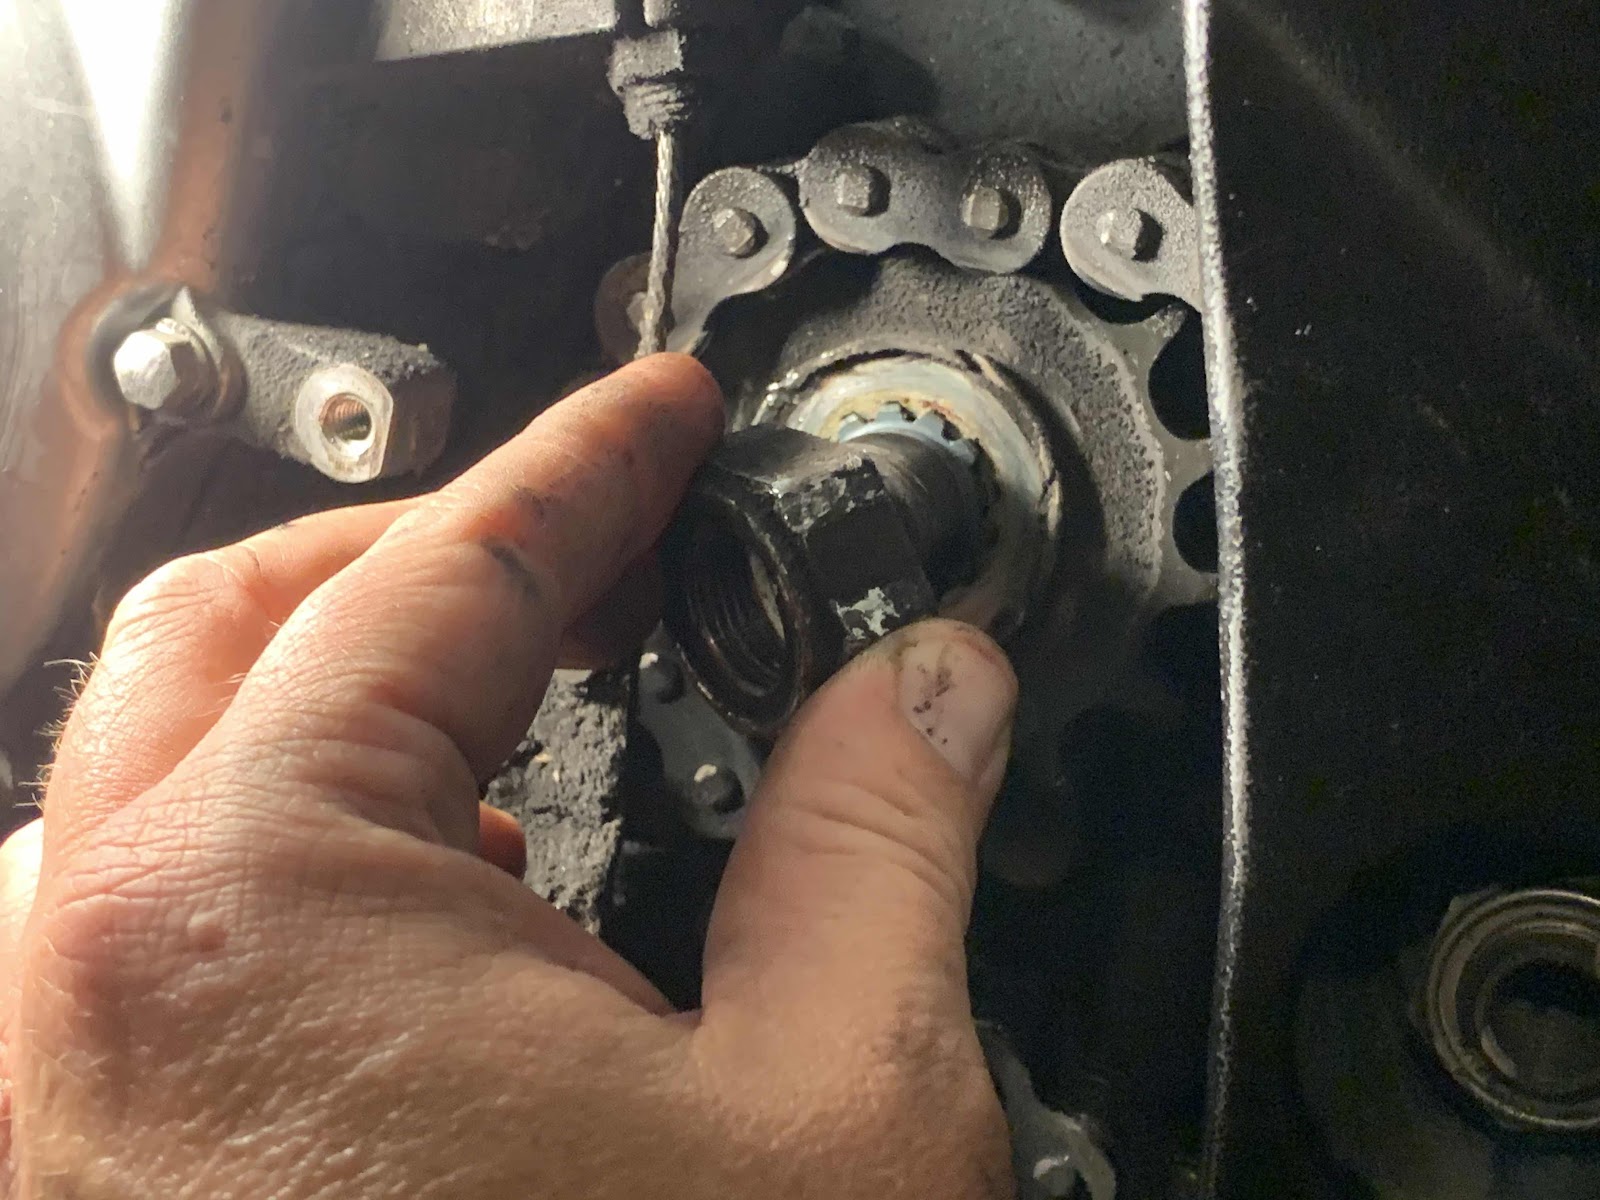
Step 2a: now you can inspect the front sprocket and see how much damage it has incurred since the last time you checked, which let’s be honest was probably ages ago, since getting that sprocket cover off is such a hassle.
Pretty ugly, huh? Thus is, for one thing, possibly the dirtiest place on the whole bike, what with all the dirty chain line being sling around in there. But even worse are all of those hooked sprocket teeth. Yup, that sucker needs to be replaced.
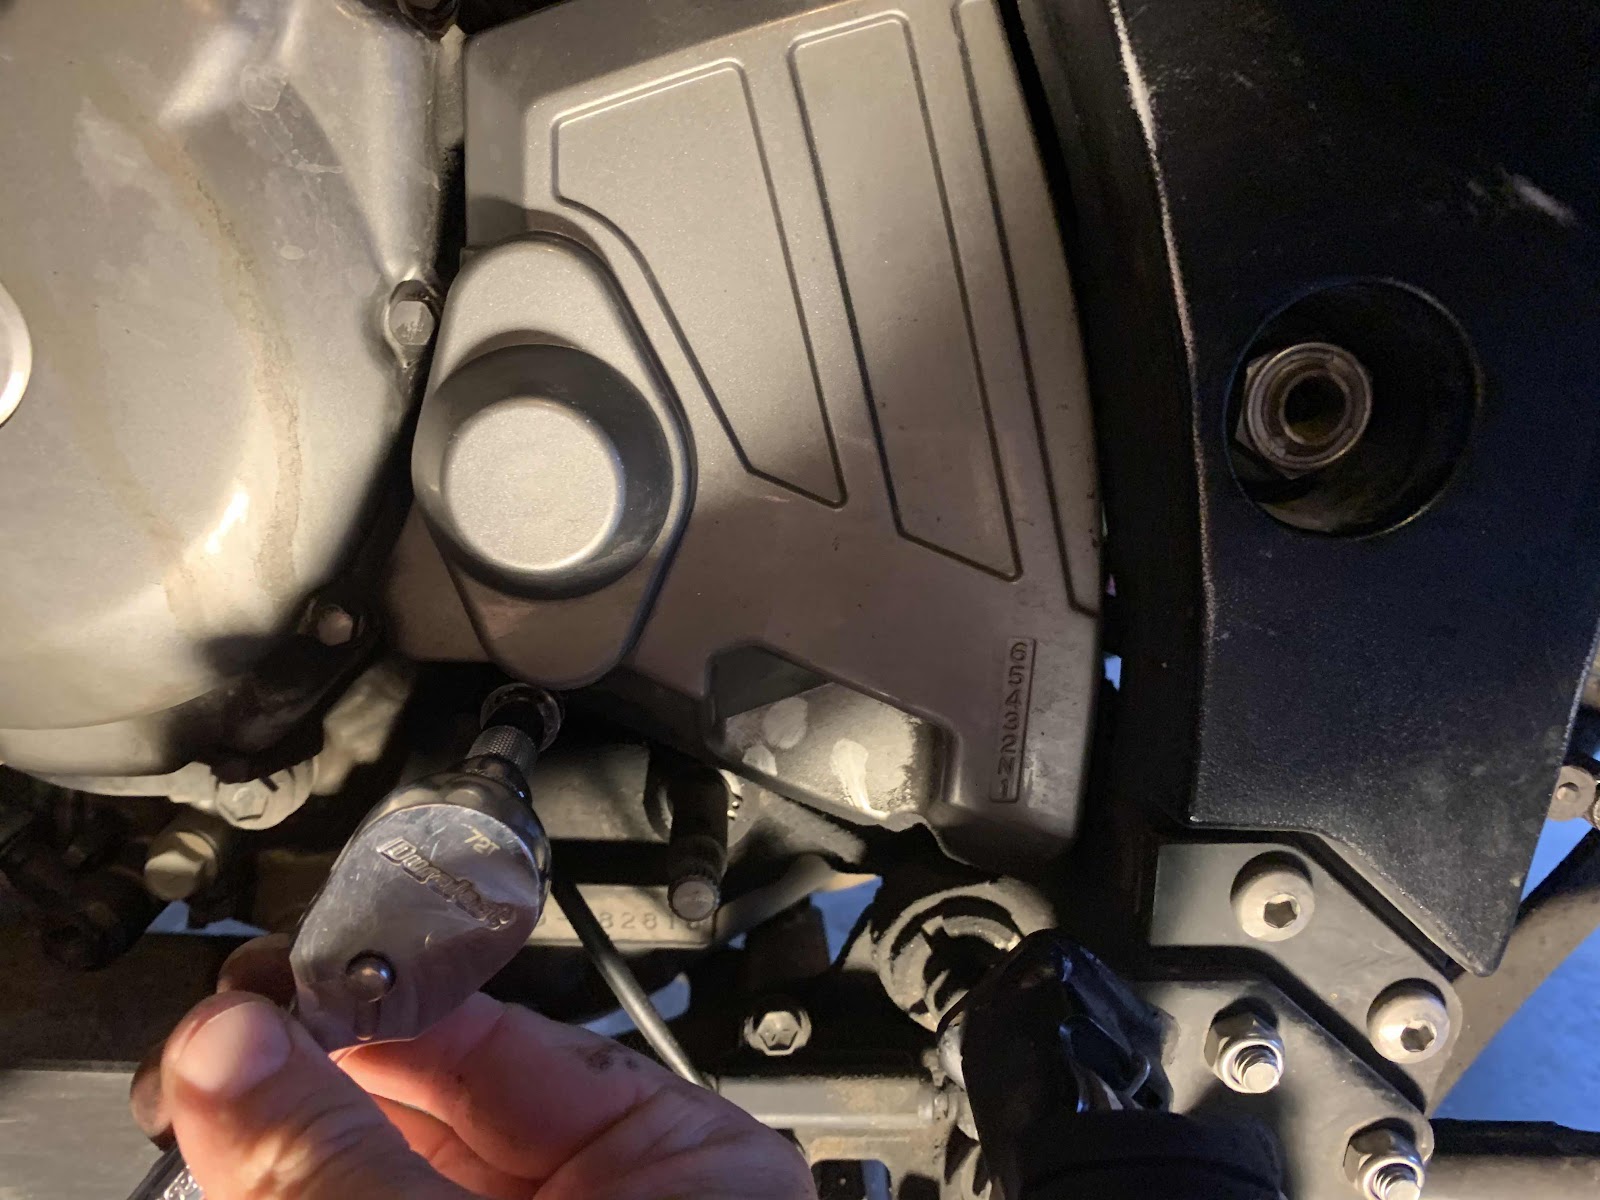
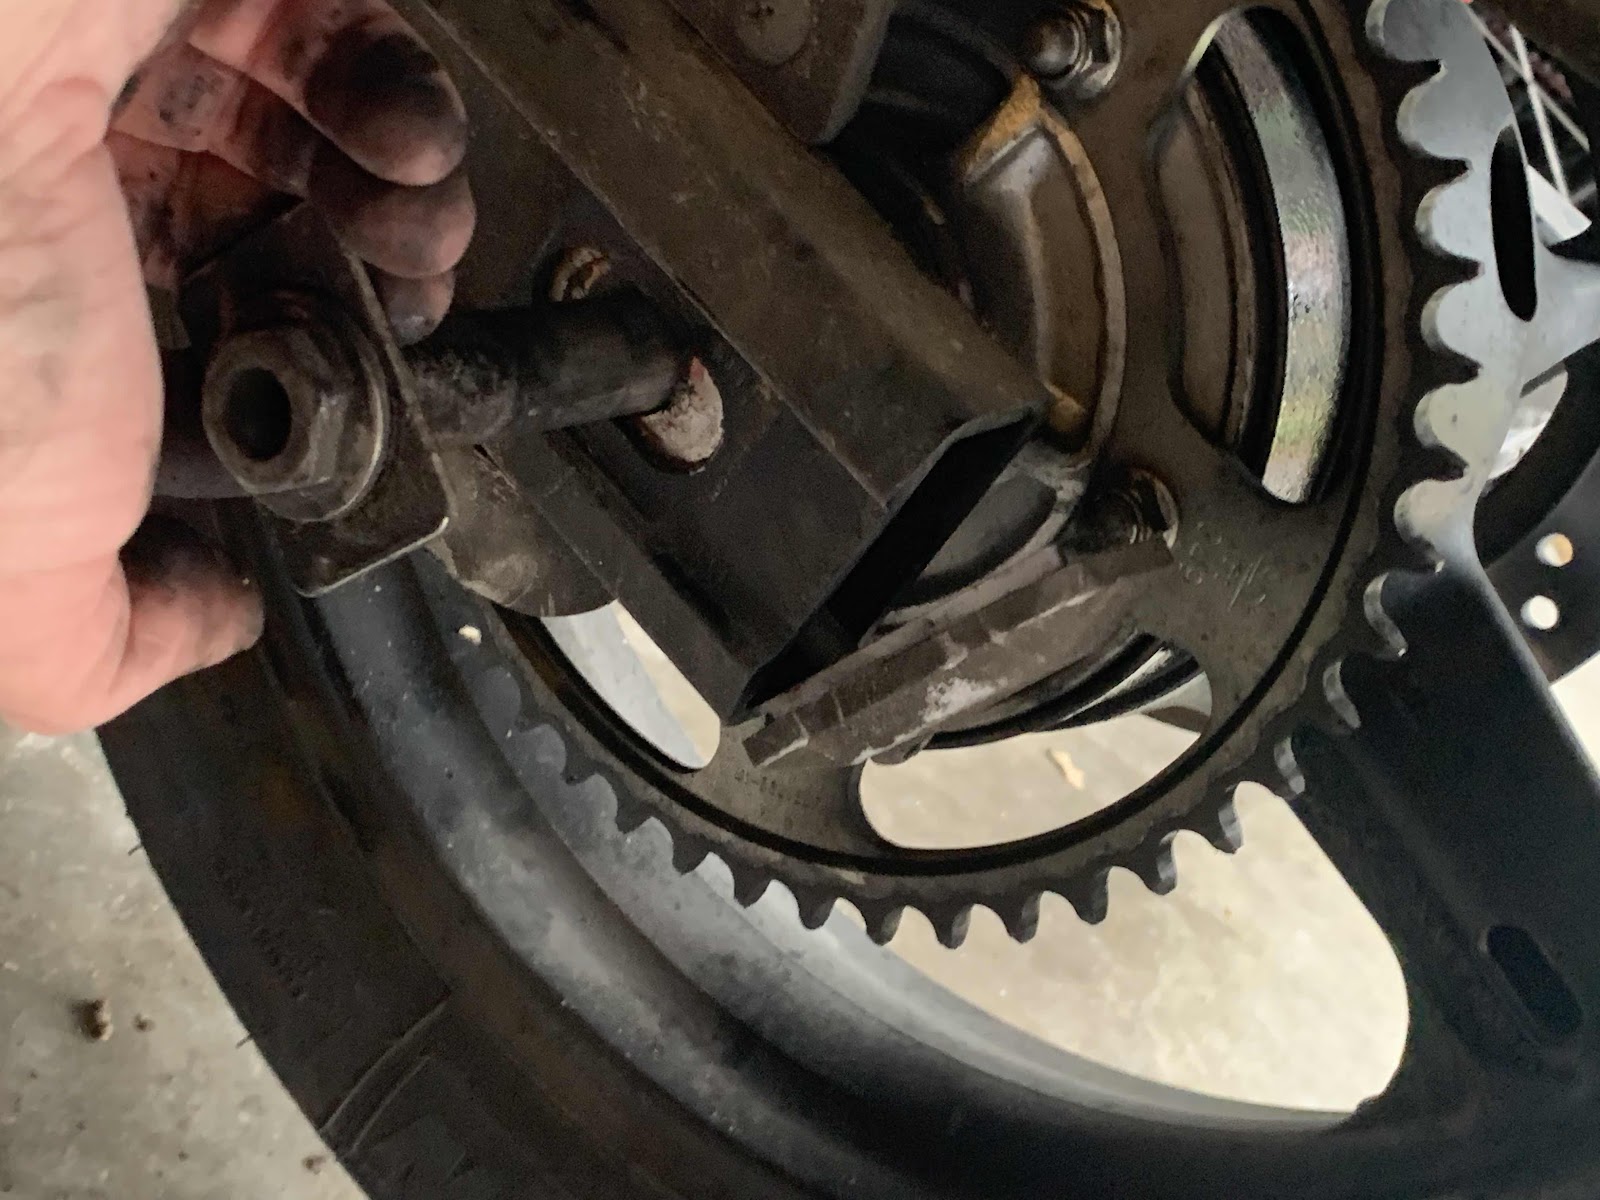
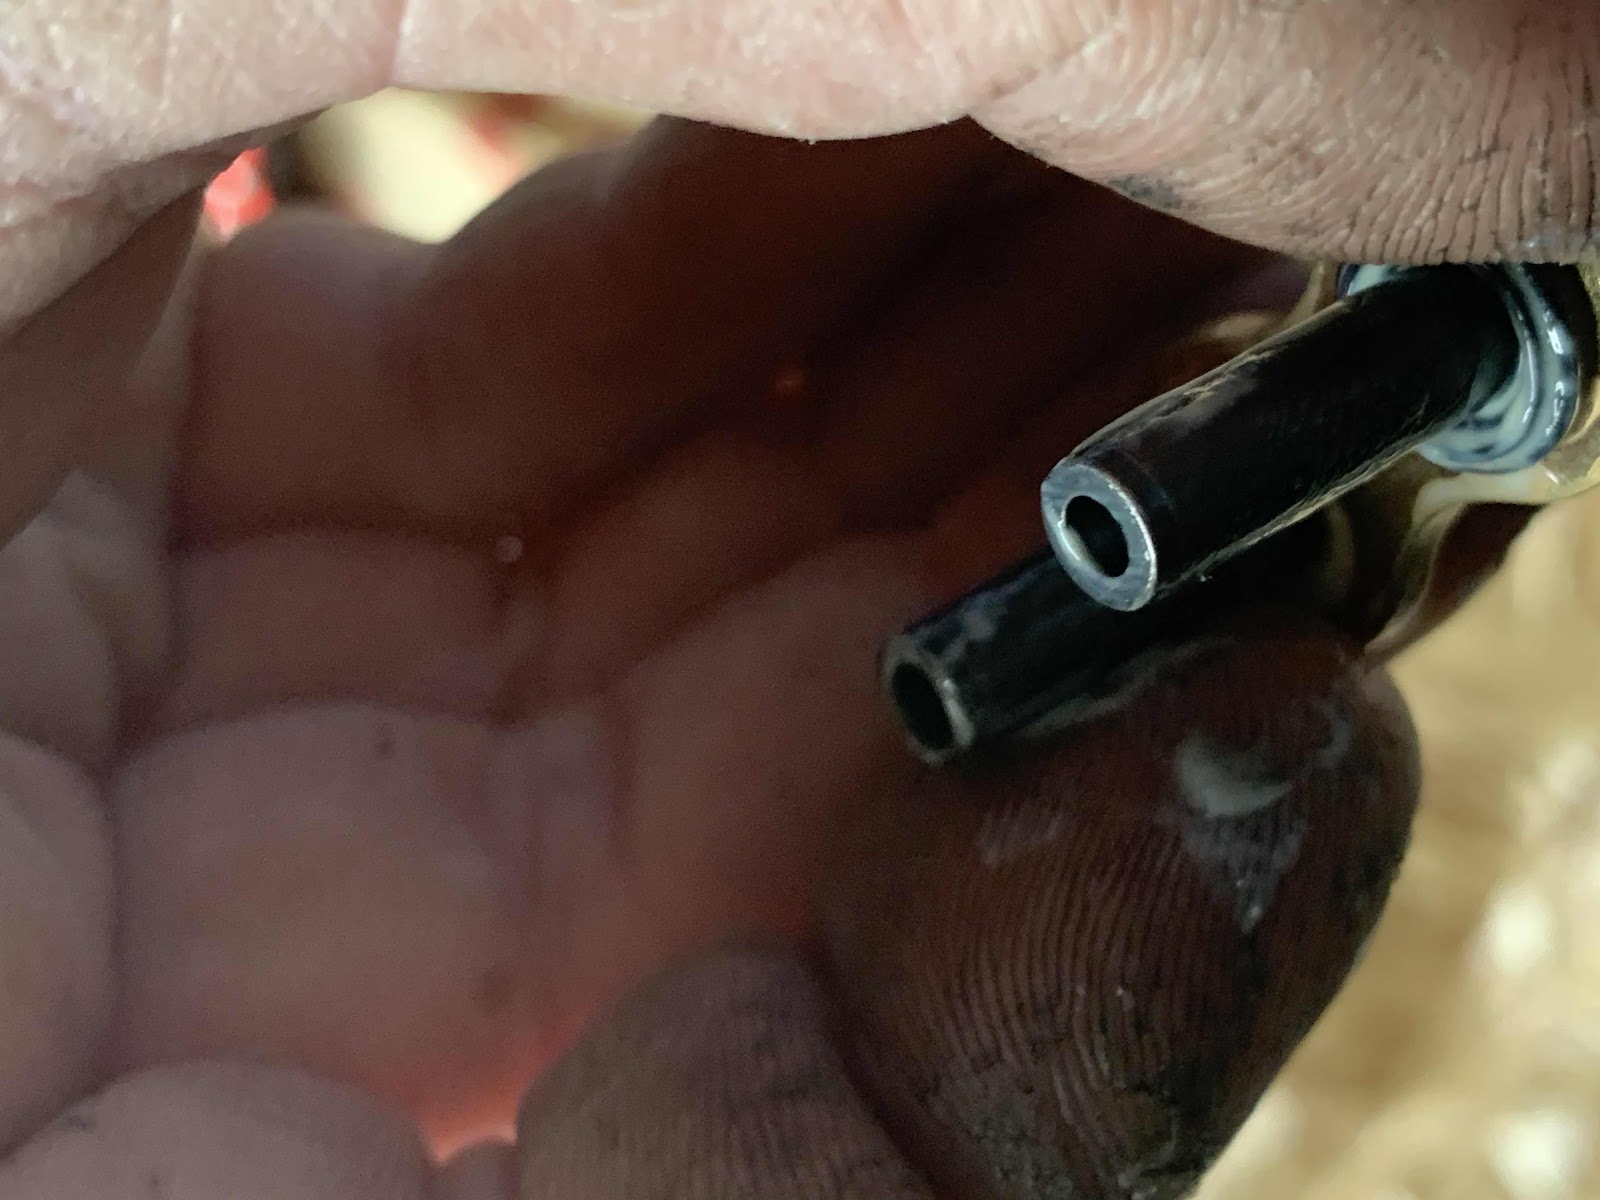
Step 2b. To get a better look at that ugly sprocket, and to be able to remove it and replace it, we need to get the clutch mechanism out of the way. There are two more bolts to remove, 10mm this time:
Not shown here is the metal rod behind the clutch mechanism that the clutch mechanism uses to push the actual clutch plate away from the gearbox. Mine was so filthy with indescribable grime that I suspect it has been hampering my shifting ability for some time. Cleaned it off thoroughly and, you guessed it, now the clutch comes all the way out when I pull the clutch lever. Imagine that!
Step 3. “Break” the bolt on the rear axle (with a breaking bar and a 24mm socket) while you still have the bike on the ground and the wheel can provide some resistance. Then put the bike up on its center stand.
Step 4a. Use a screwdriver and a hammer to flatten out the washer behind the front sprocket nut so that the nut can actually turn. I don’t recommend that you spend several minutes trying to break the bolt with the bent washer in place only to realize what an idiot you were because there is no way for it to turn like that.
Step 4b. Attach the longest breaking bar you have available to a whopping 32mm hex socket. Attach it to the bolt as shown below. Mount the bike (still up on its center stand), and step down as hard as you can on the rear brake with your right foot while you step down as hard as you can on the breaker bar with your left. Maybe the guy who owned her before me used a bit too much Loctite or something, but that is seriously the only way I could get this bolt to budge.
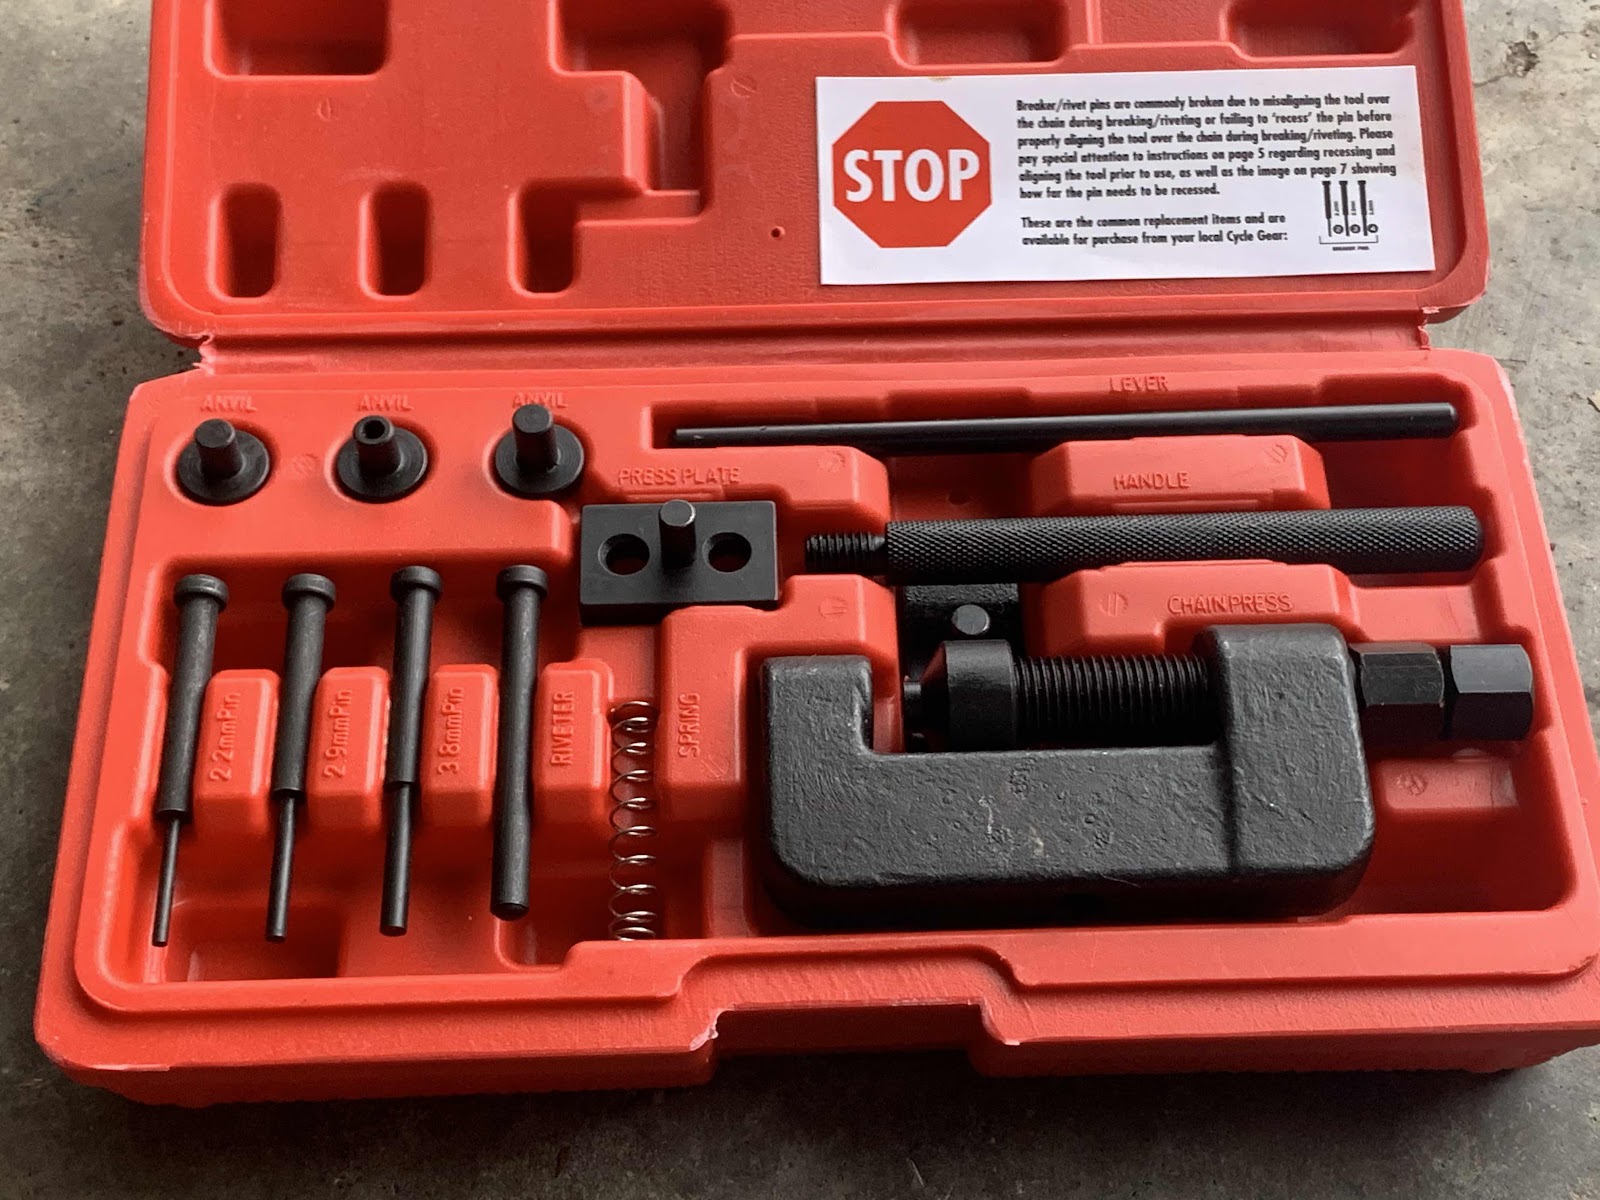
Step 5. Now it is time to break the chain. You will need a chain breaking and riveting tool such as the one I got from Stockton Tool a.k.a. Cycle Gear:
Note that this is not a recommendation for this particular kit. I haven’t had time and money and enough bad chains to test any more than this one kit for a comparative review, and as you will see the breaking pin came out a bit worse for wear after I used it the first time. The documentation that comes with the kit does note that the breaking pins are consumable items that can be picked up from Cycle Gear rather than having to buy a whole new kit. How nice of them!
See how I used the chain breaker in the following video:
Step 6. Disassemble everything.
It might be the easiest thing at this point to just thread the broken chain off the bike by turning the rear wheel and/or the front sprocket, and then take the front sprocket off the bike. If you previously shifted your transmission into gear like I did, you will have to remove the front sprocket first by loosening the chain from around it, which is somewhat more awkward:
Old chain, new chain:
Old sprocket, new sprocket:
(And this is *definitely* a recommendation for SuperSprox sprockets. Also note that I “went up” one tooth in my replacement sprocket and also down a couple of teeth on the rear – best bike mod I’ve done yet, has my “wee-Strom” comfortable at interstate speeds without any noticeable loss in the acceleration department. Kinda feels like she was meant to be geared this way.)
Finish the disassembly by taking the rear axle out:
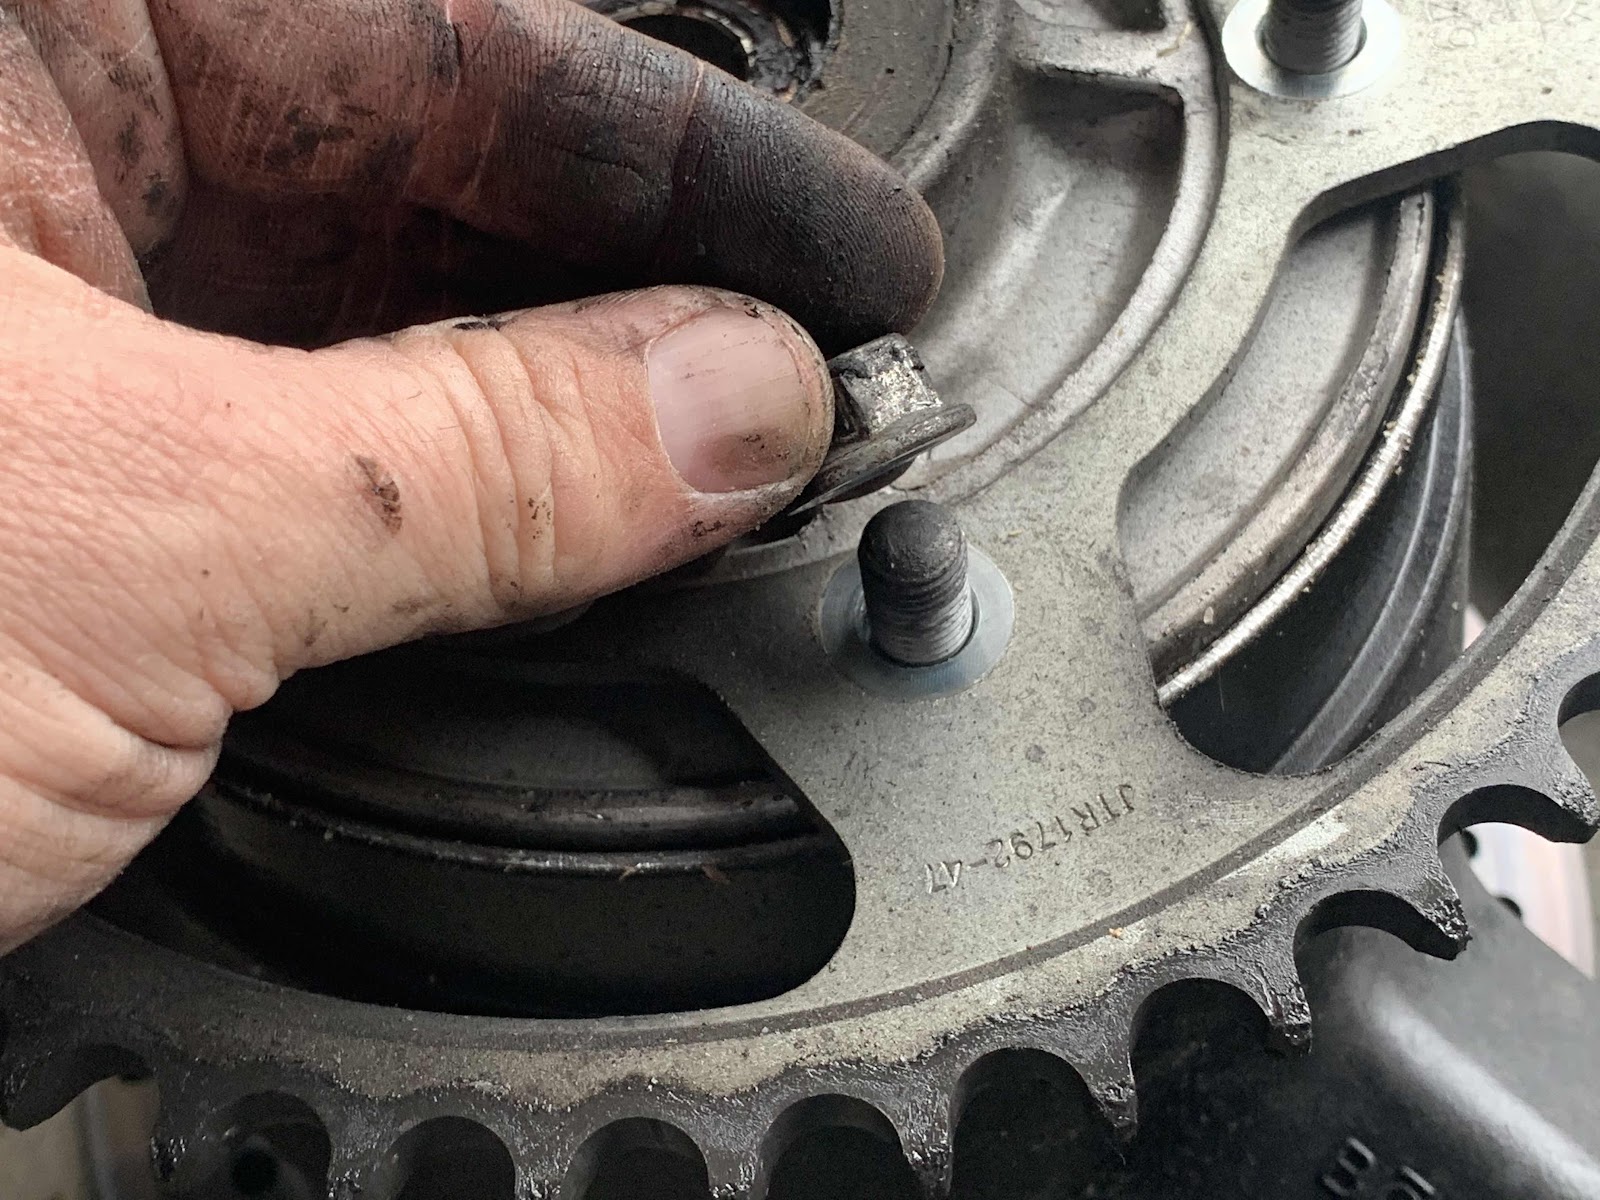
Step 7. Change the rear sprocket:
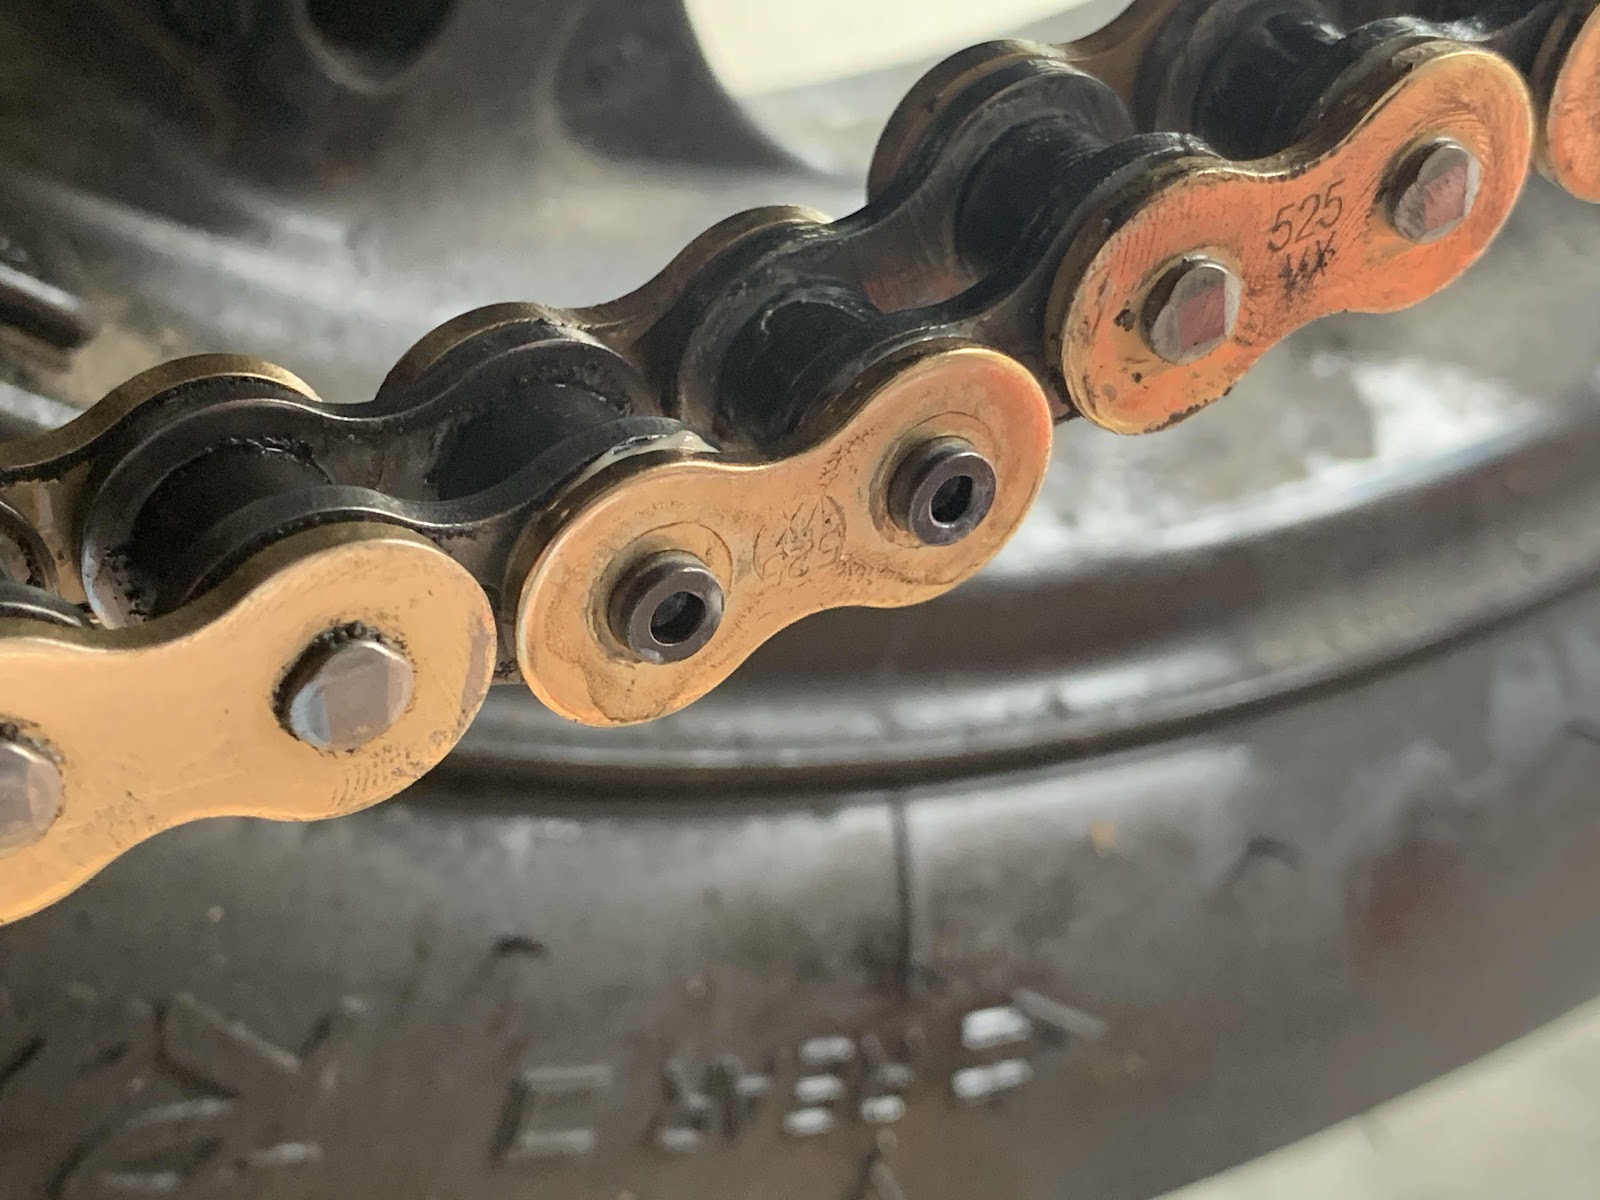
Step 8. Mount the back tire back on the bike and hand-tighten with the chain adjusters on the loosest setting. Mount the new front sprocket and hand-tighten. Thread the new chain onto the sprockets and measure to see if you have the right number of links. If you are like me, you bought a pre-built chain with a factory-set number of links (120 in my case) and so your chain will end up being a link or two too long:
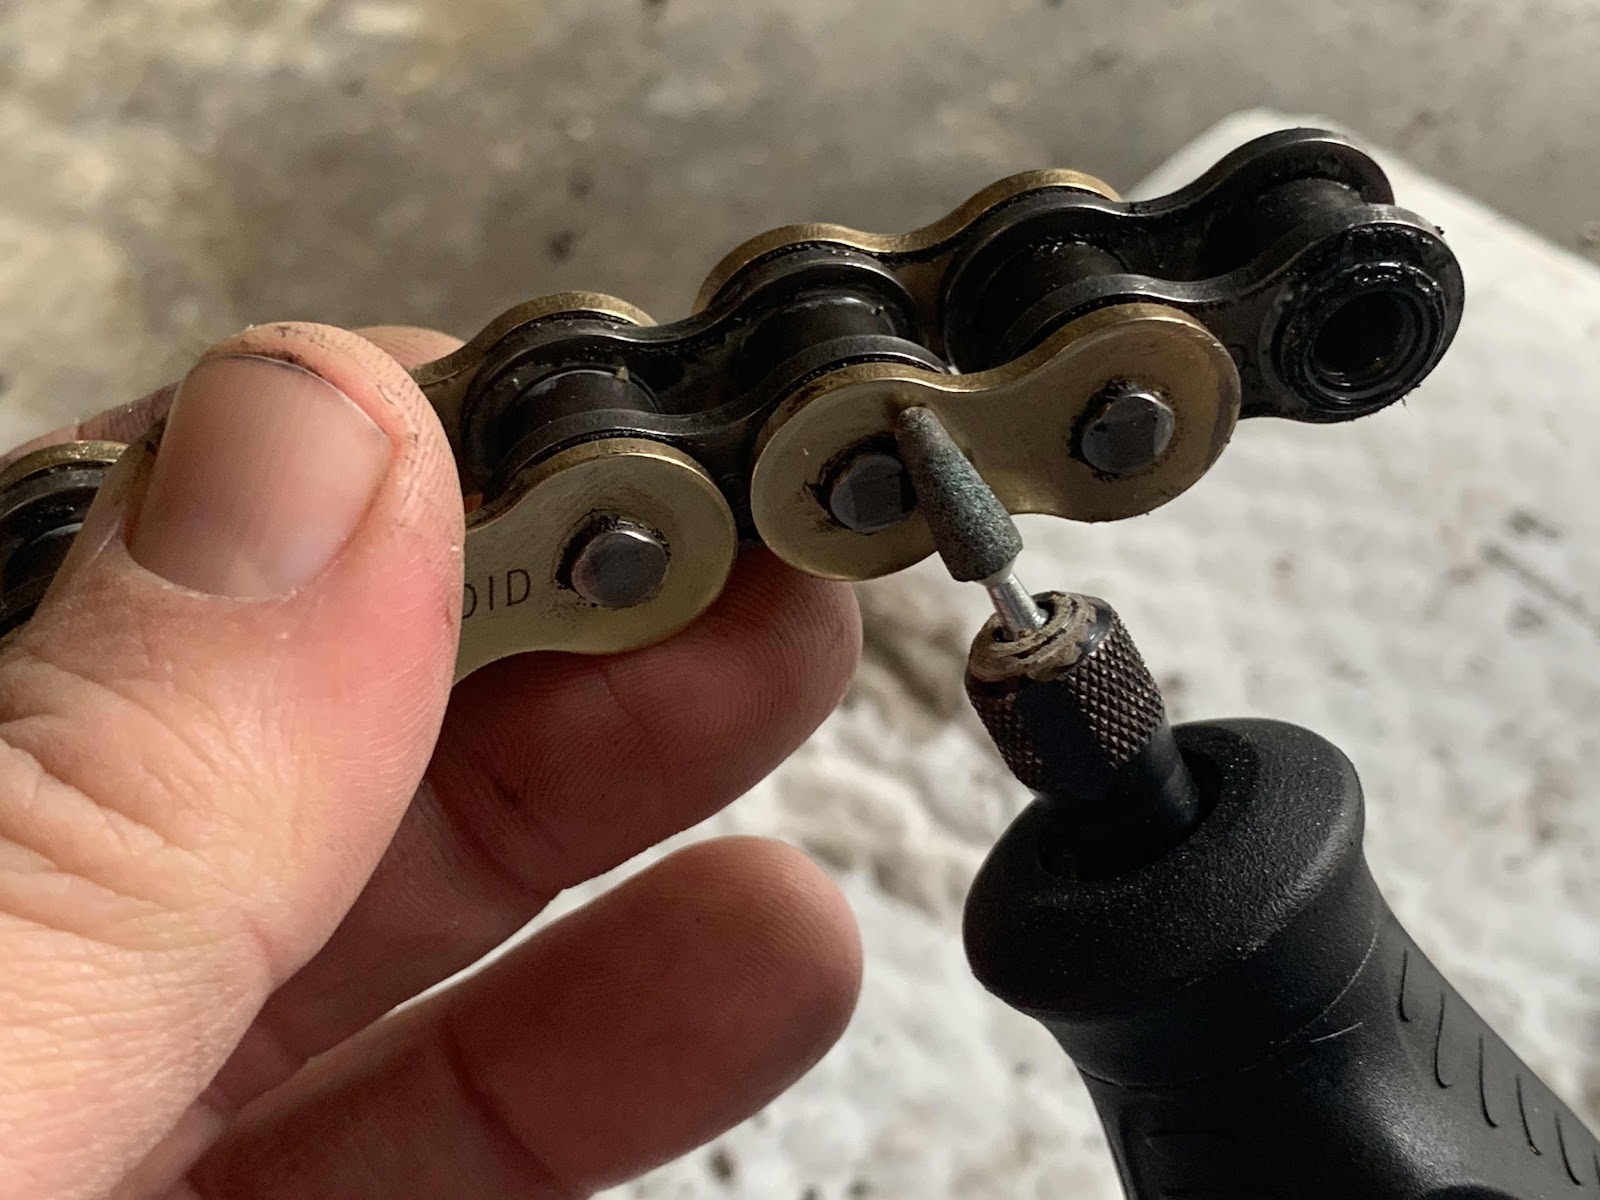
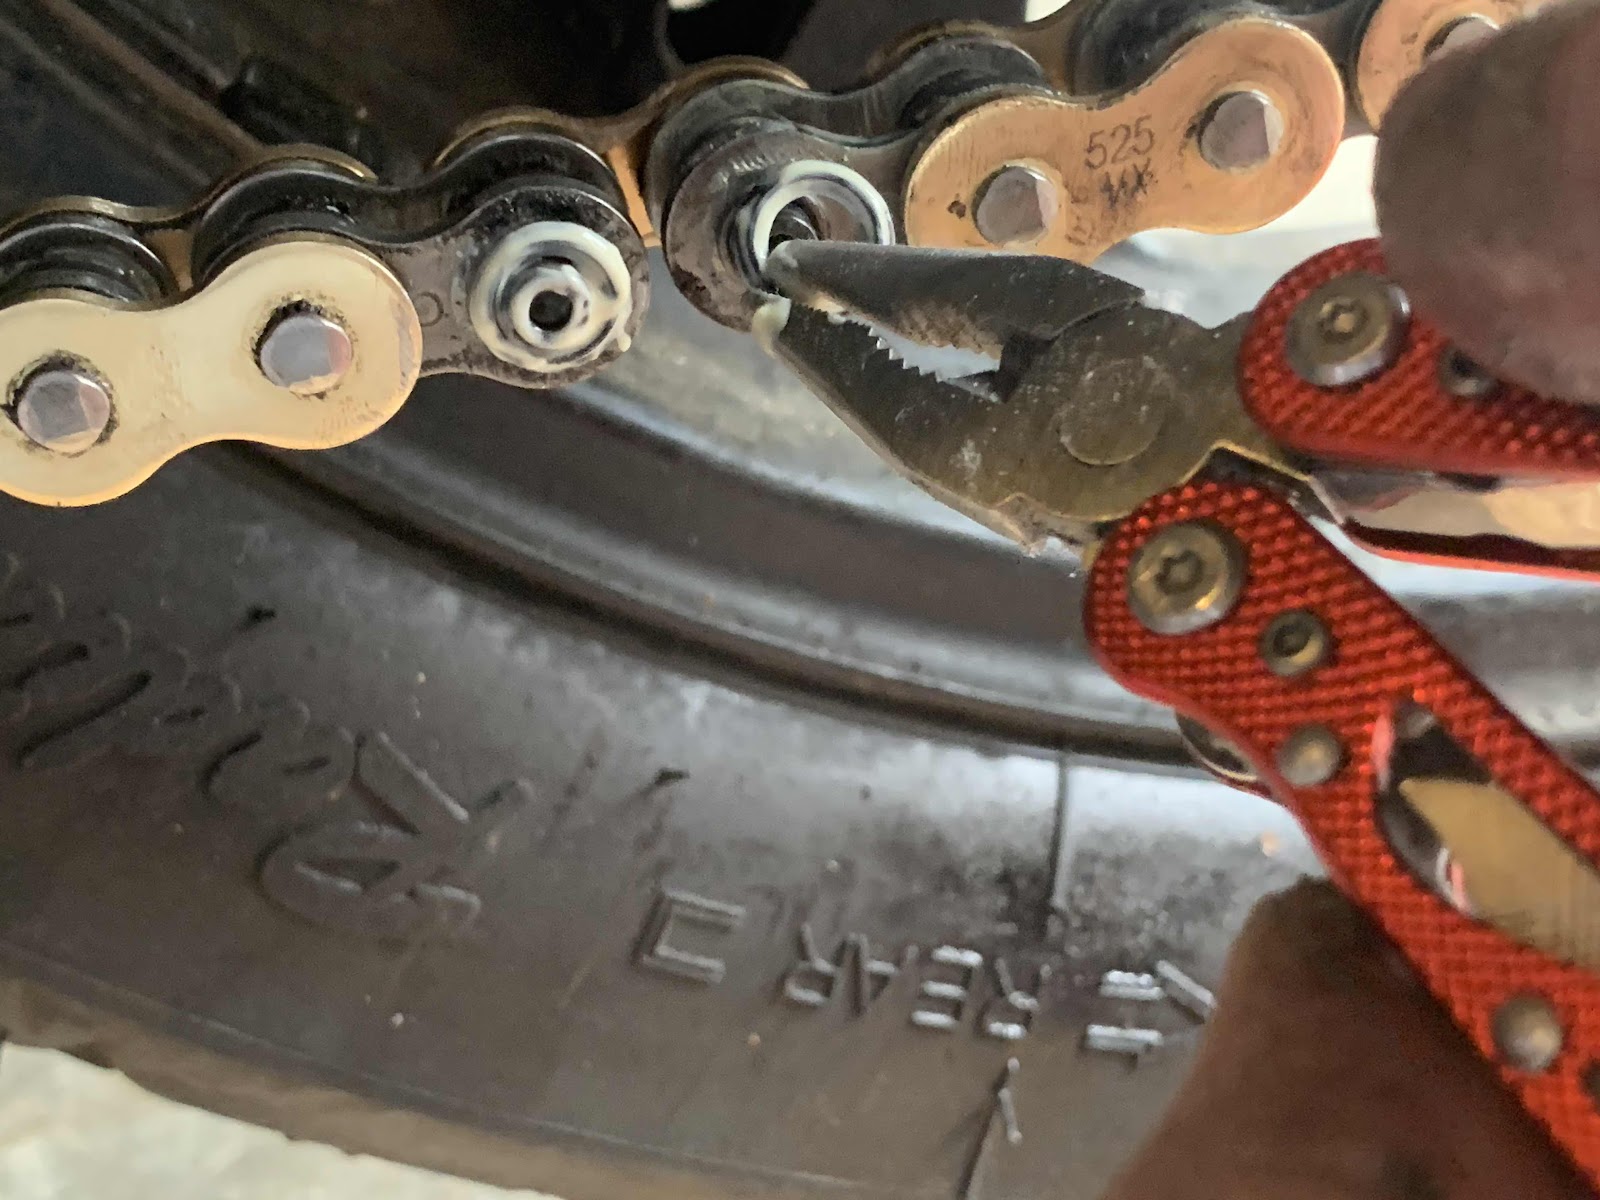
Step 9. Remove the extra links.
Start by grinding the flattened metal of the link pin down so that your chain breaker has a fighting chance of pushing it through:
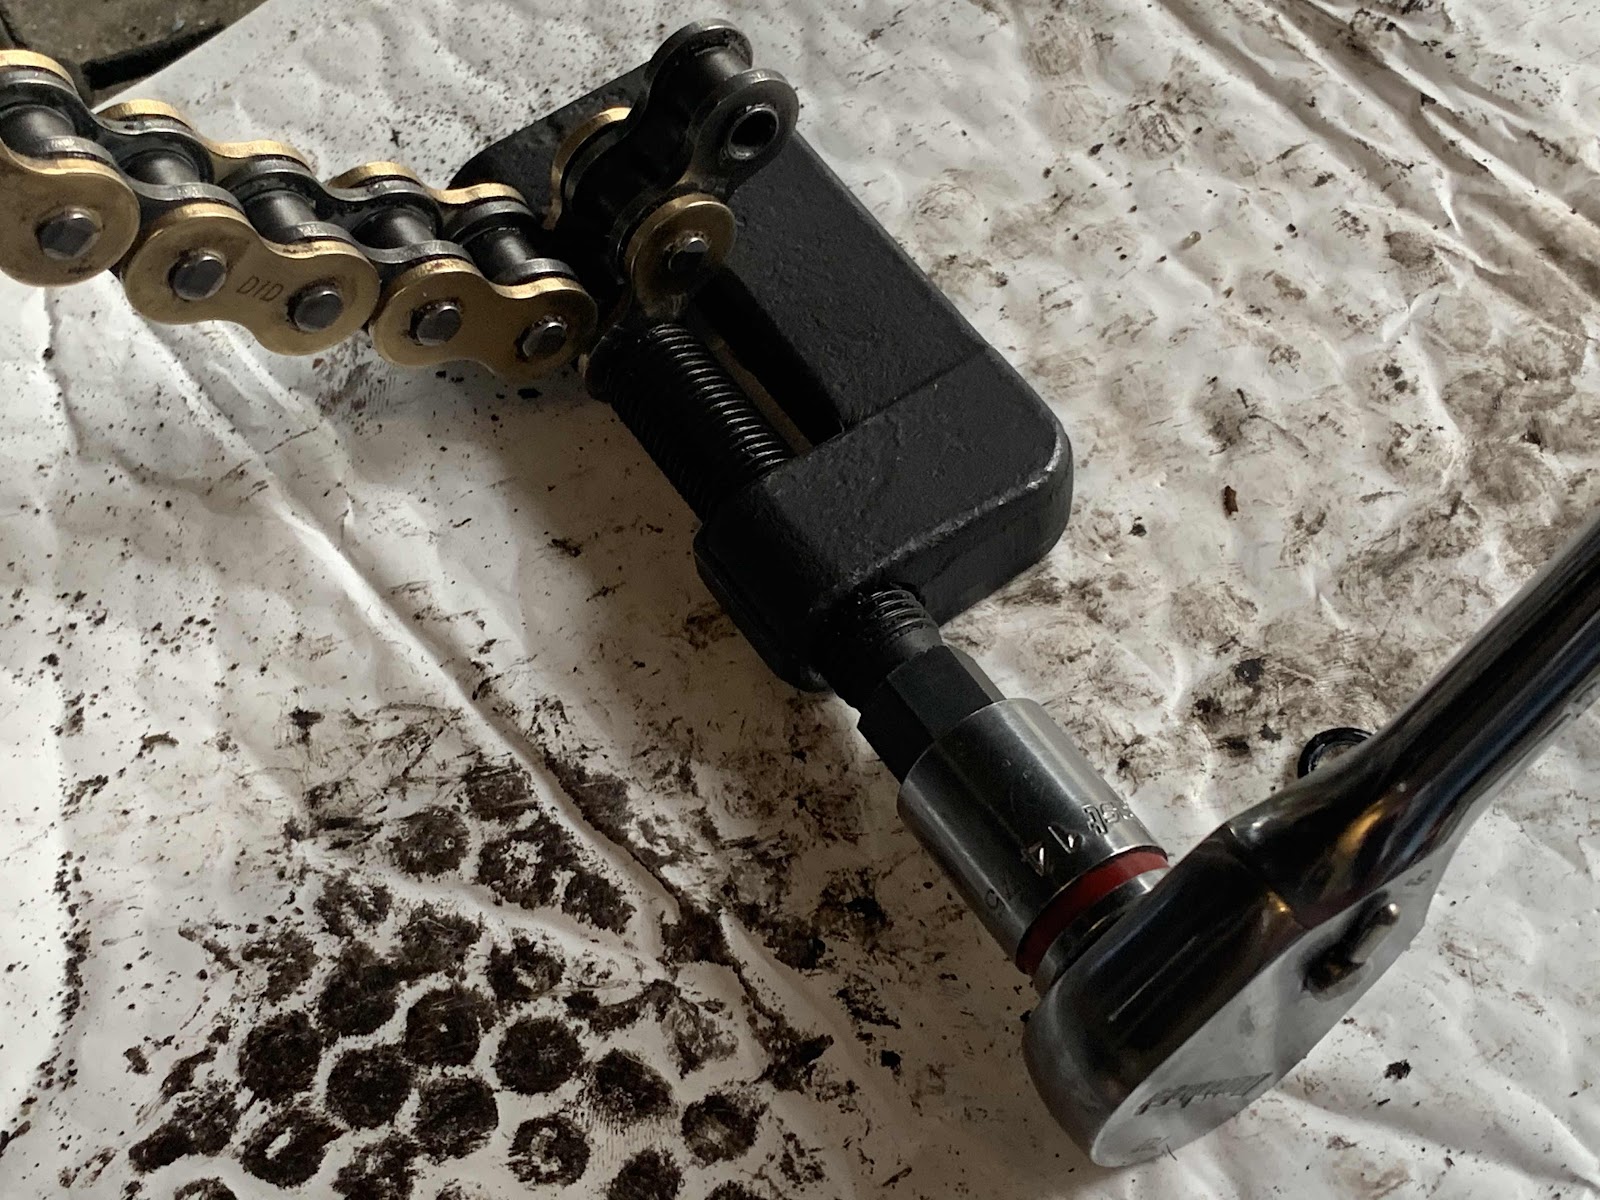
Then use the chain breaker as before to push the desired pin out:
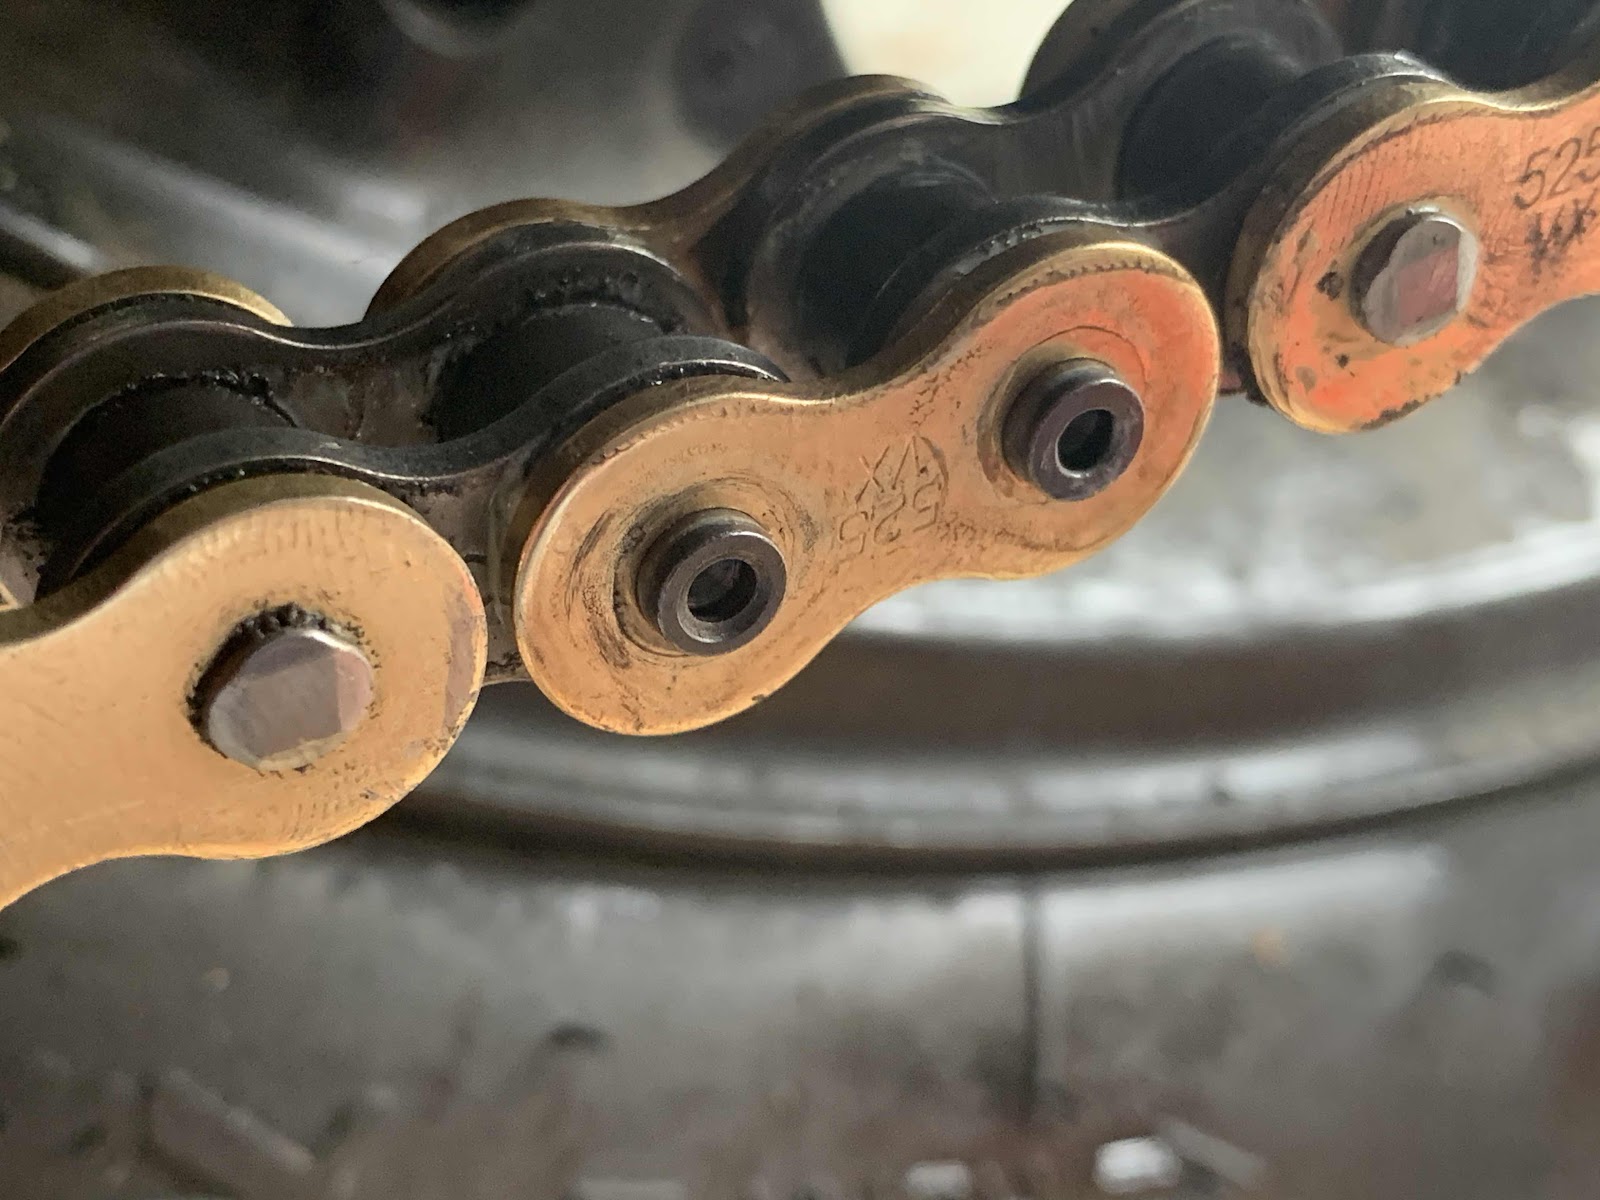
Step 10. Assemble the “master link”
Spread chain grease all over the x-rings:
Assemble two x-rings onto the side of the master link with the posts:
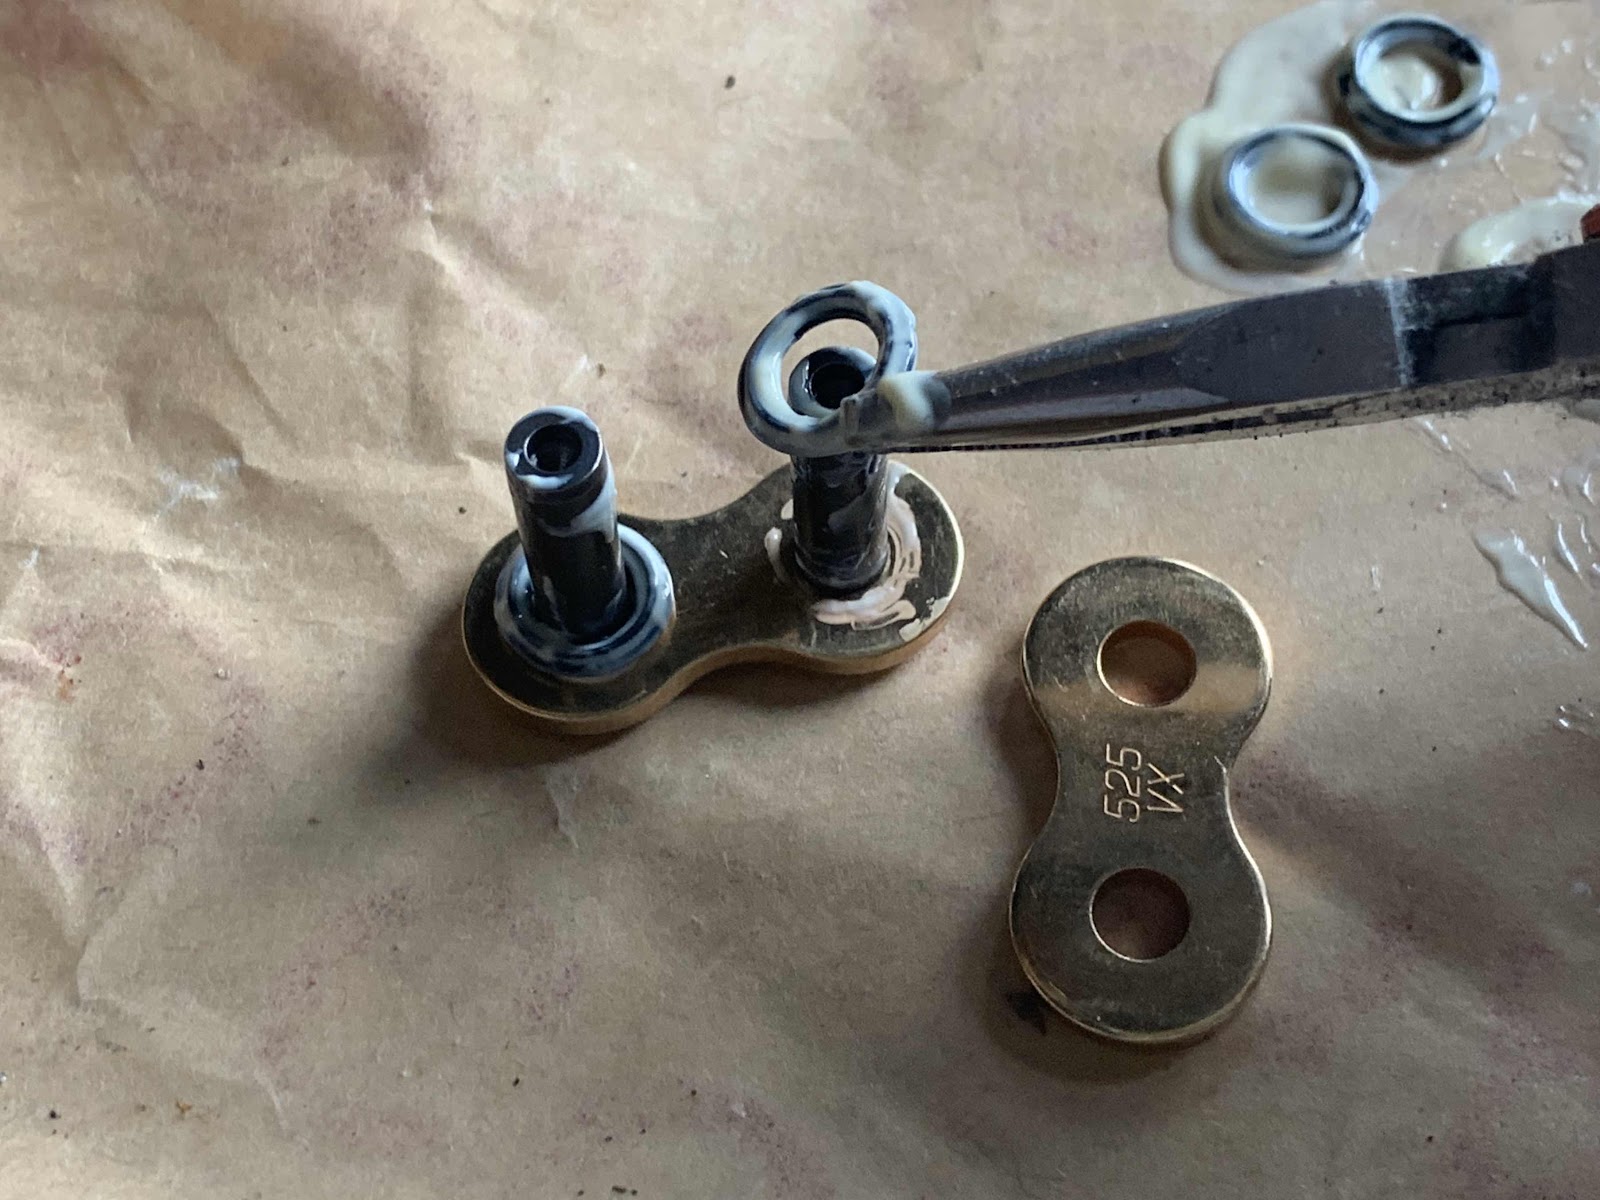
Now spread chain grease all over the posts (after all, the x-rings need to have something to hold in):
Assemble the master link between the two loose ends of the chain:
Add x-rings to the bare ends of the posts:
And assemble the other side of the master link into place:
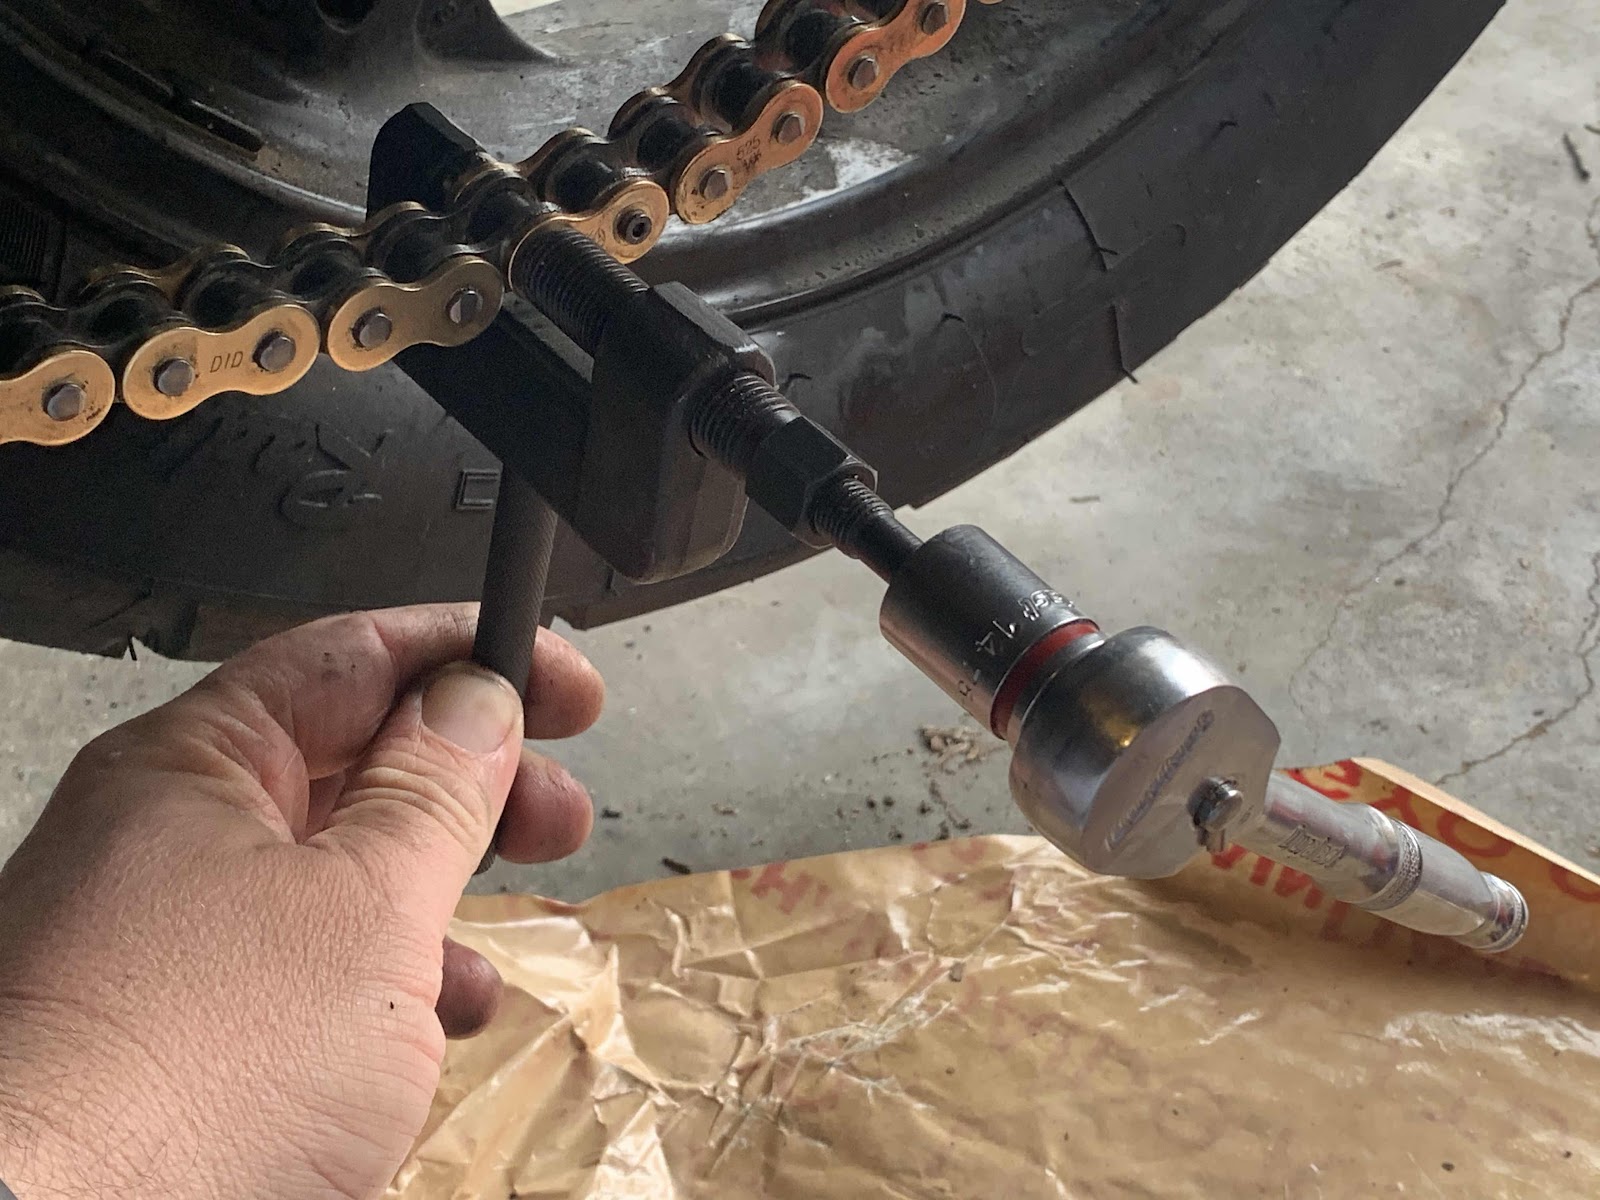
Step 11. Press the master link with your chain tool until the posts stick out far enough that they can be riveted:
Step 12: rivet the posts. Assemble the chain tool just like you had for breaking the chain, but using the riveting pin instead of the breaking pin, then press each master link post until it has spread enough to hold the link in place (but not too hard, lest it prevent the link from flexing properly - its an art, apparently):
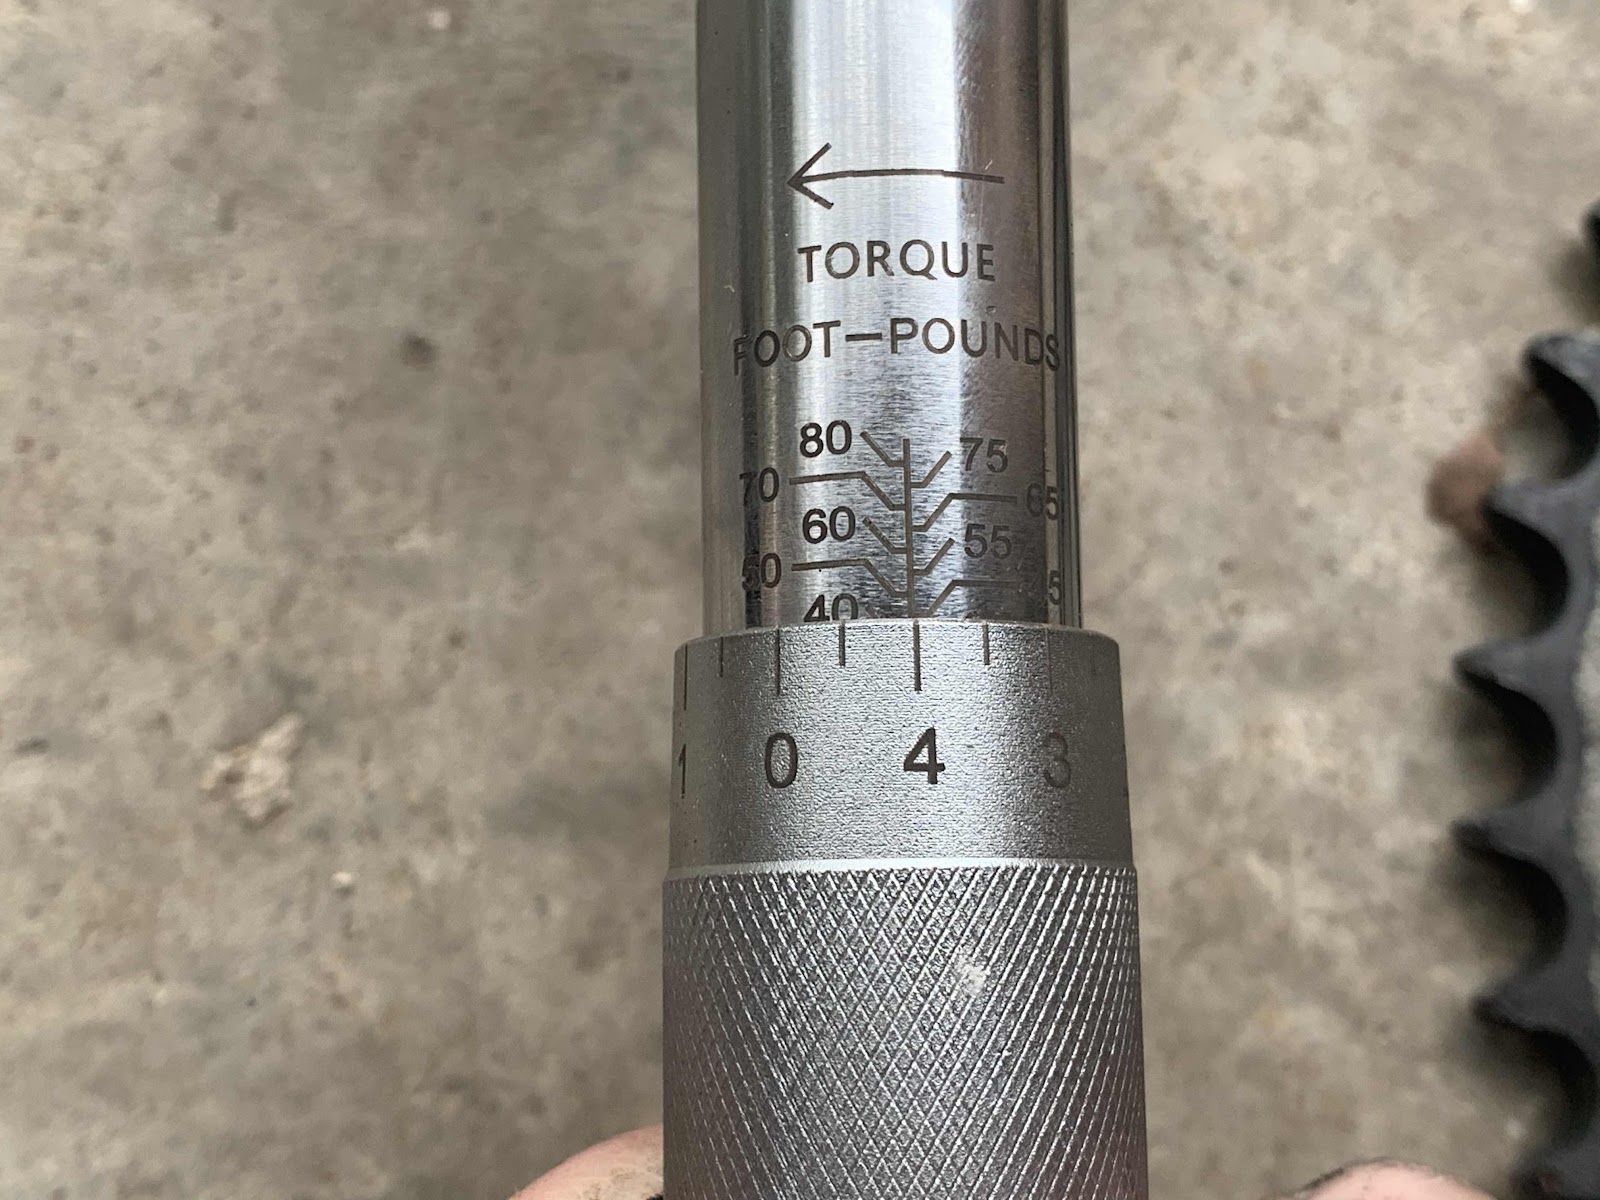
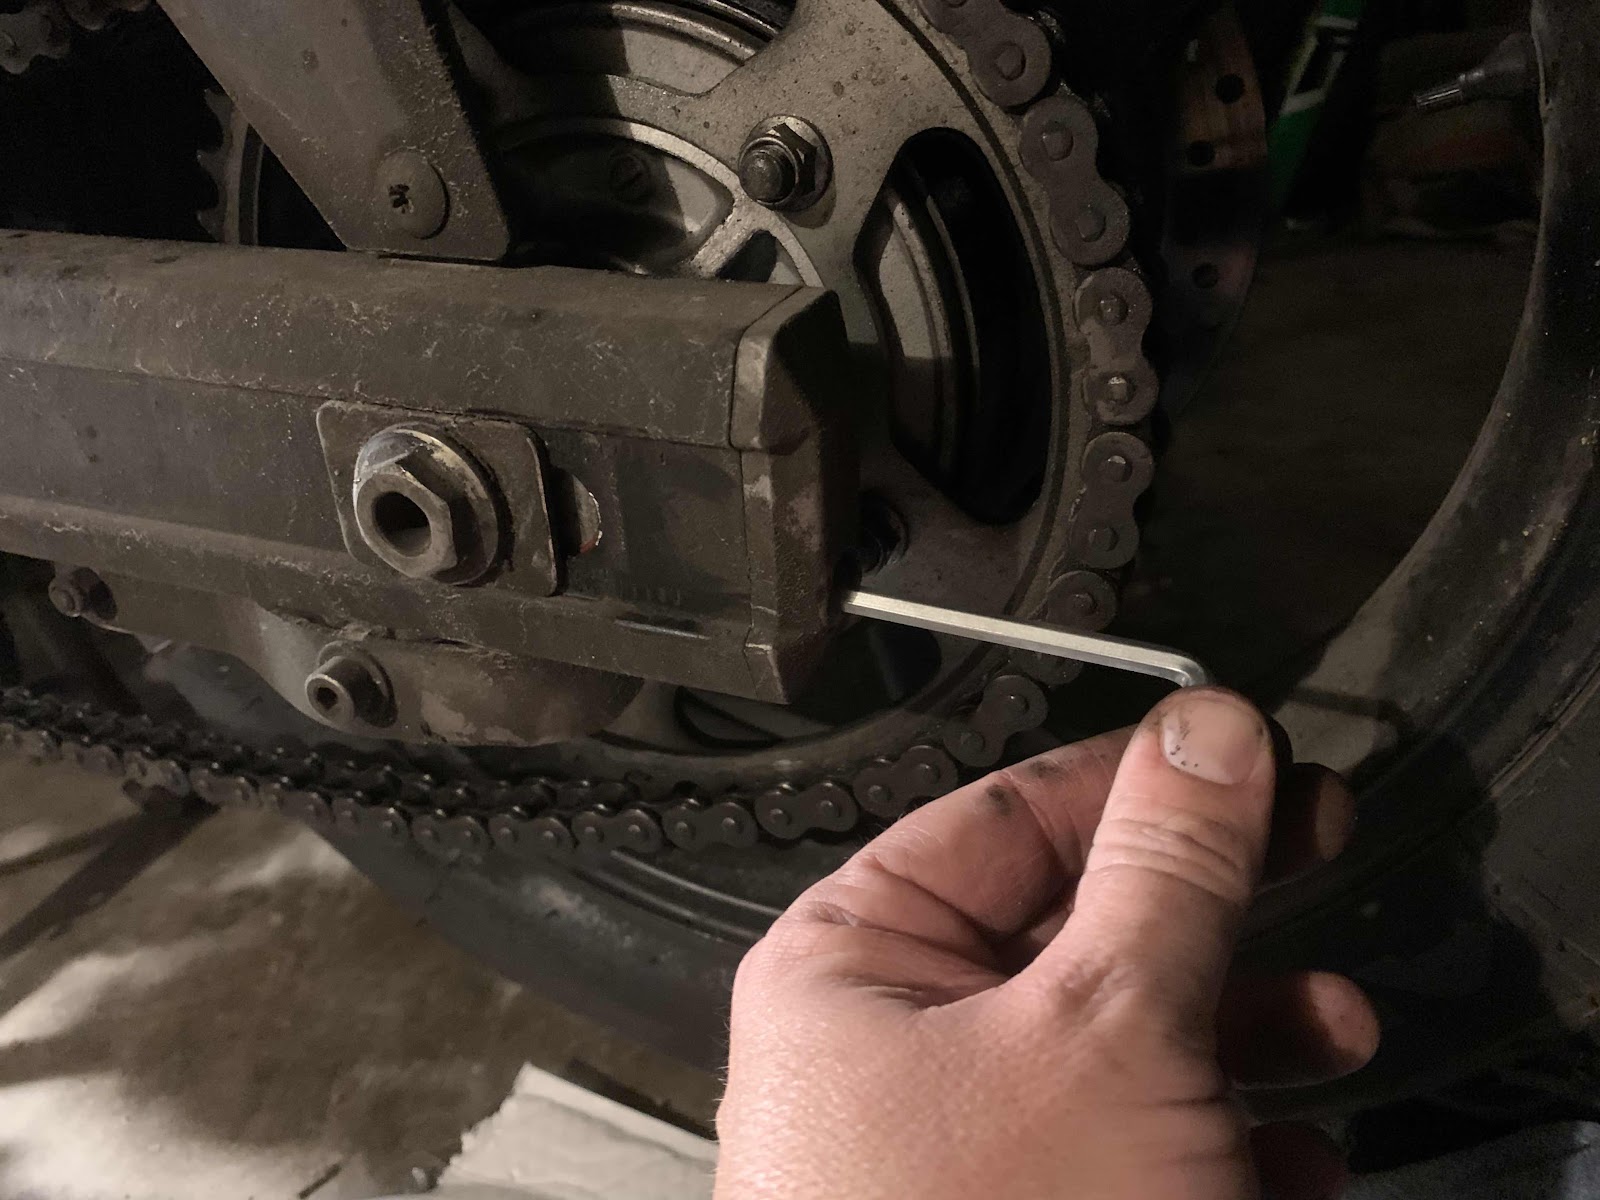
Step 13: take the bike off its center stand so the chain flex and sag are correct for the suspension under load. Adjust the chain adjusters until the chain sag on the bottom end is at an appropriate level (about 25mm is typical). Torque the rear axle bolt to the appropriate value.
Step 14a. knock the bike completely over by trying to torque the front sprocket bolt while it’s leaning on the side stand:
On second thought, skip that step.
Step 14b. Put the bike back up on its center stand, mount the bike, stomp down as hard as you can on the rear brake, and pull hard on your torque wrench until it hits the correct value. Sorry, but I don’t have a photo of this ridiculous procedure!
Step 15. Reassemble the clutch mechanism, front sprocket cover, and gear shift lever in reverse order of the first few steps of this how-to.
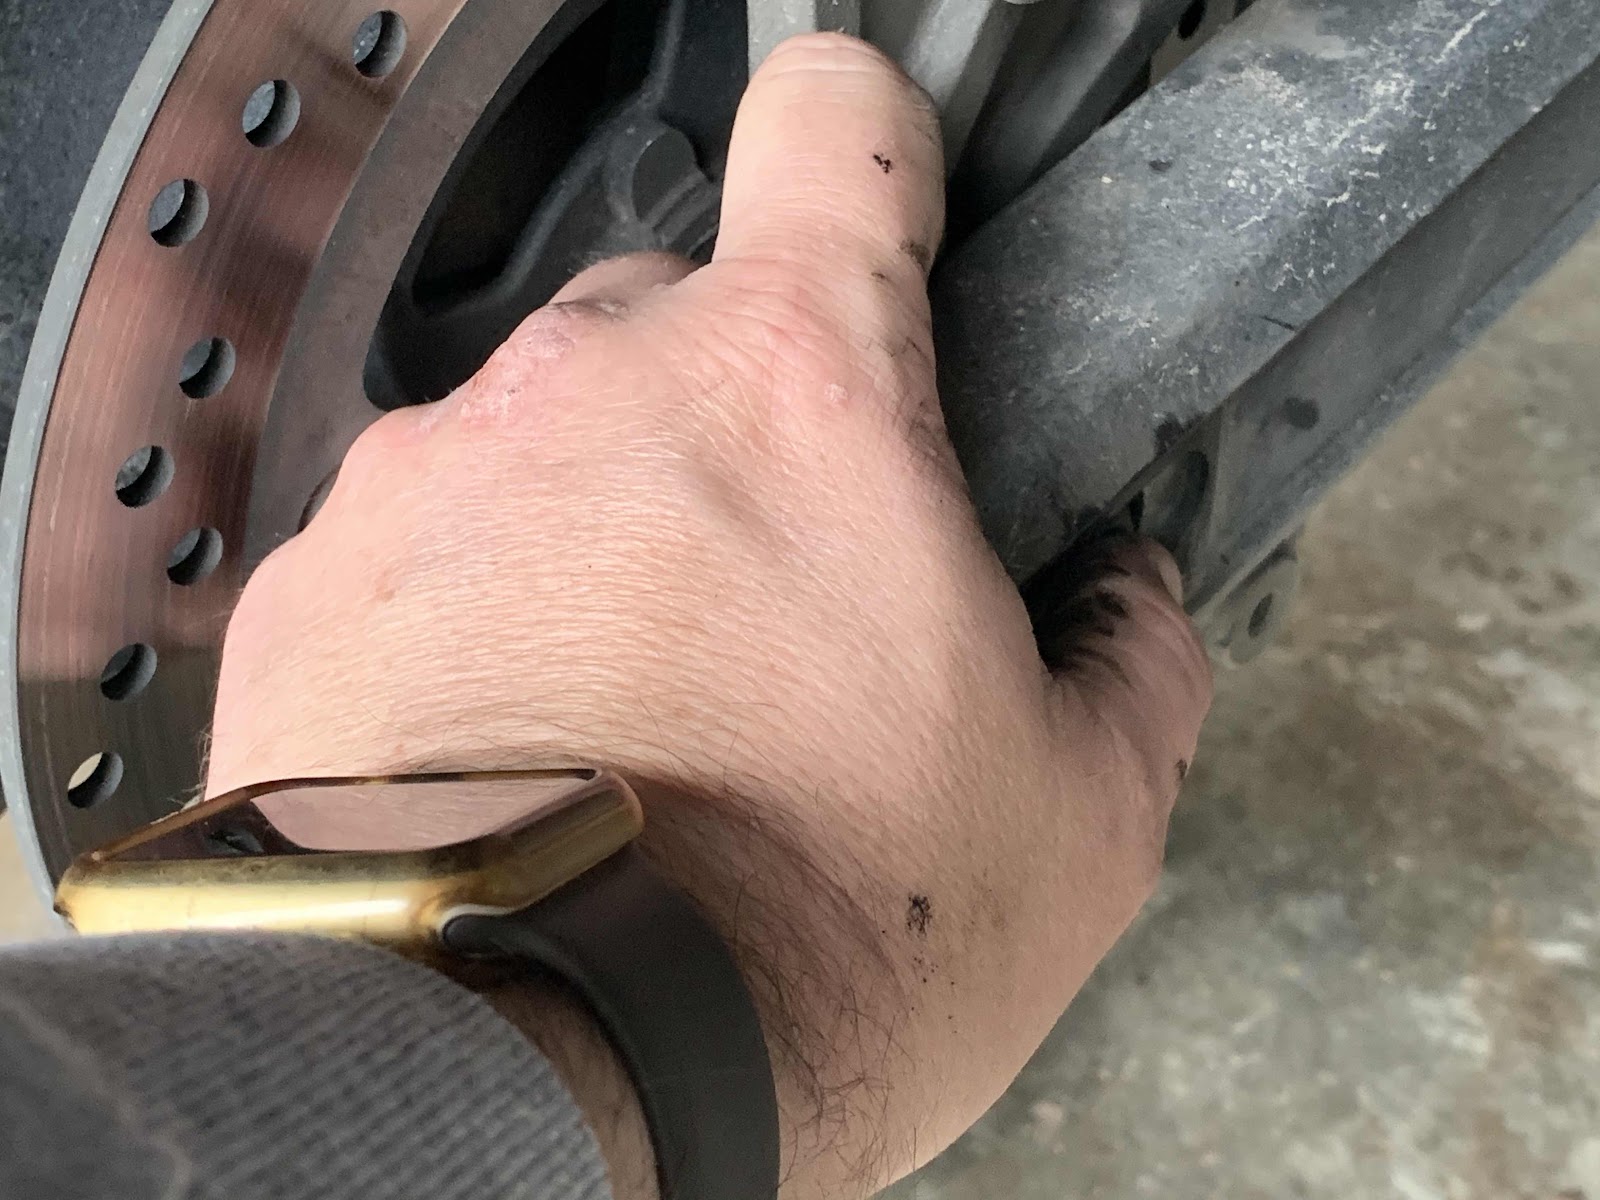
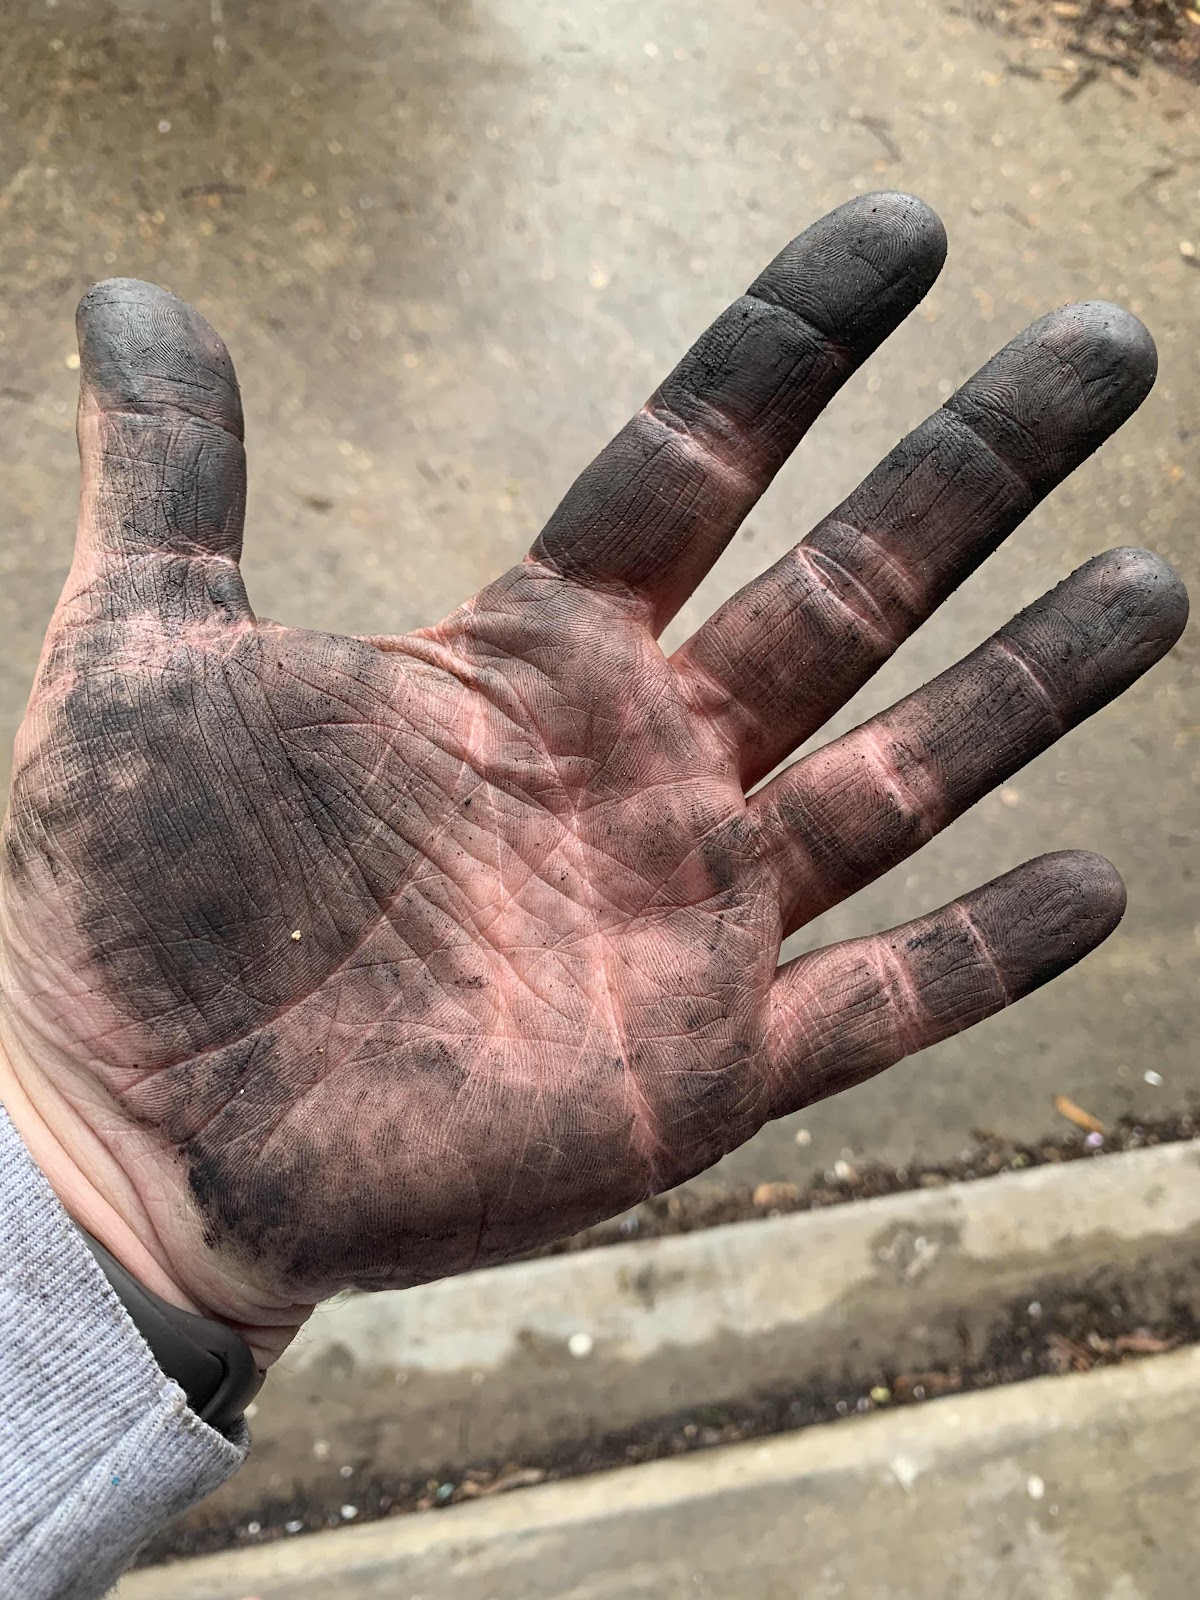
By now, your hands should look like this:
Your work space should look like this:
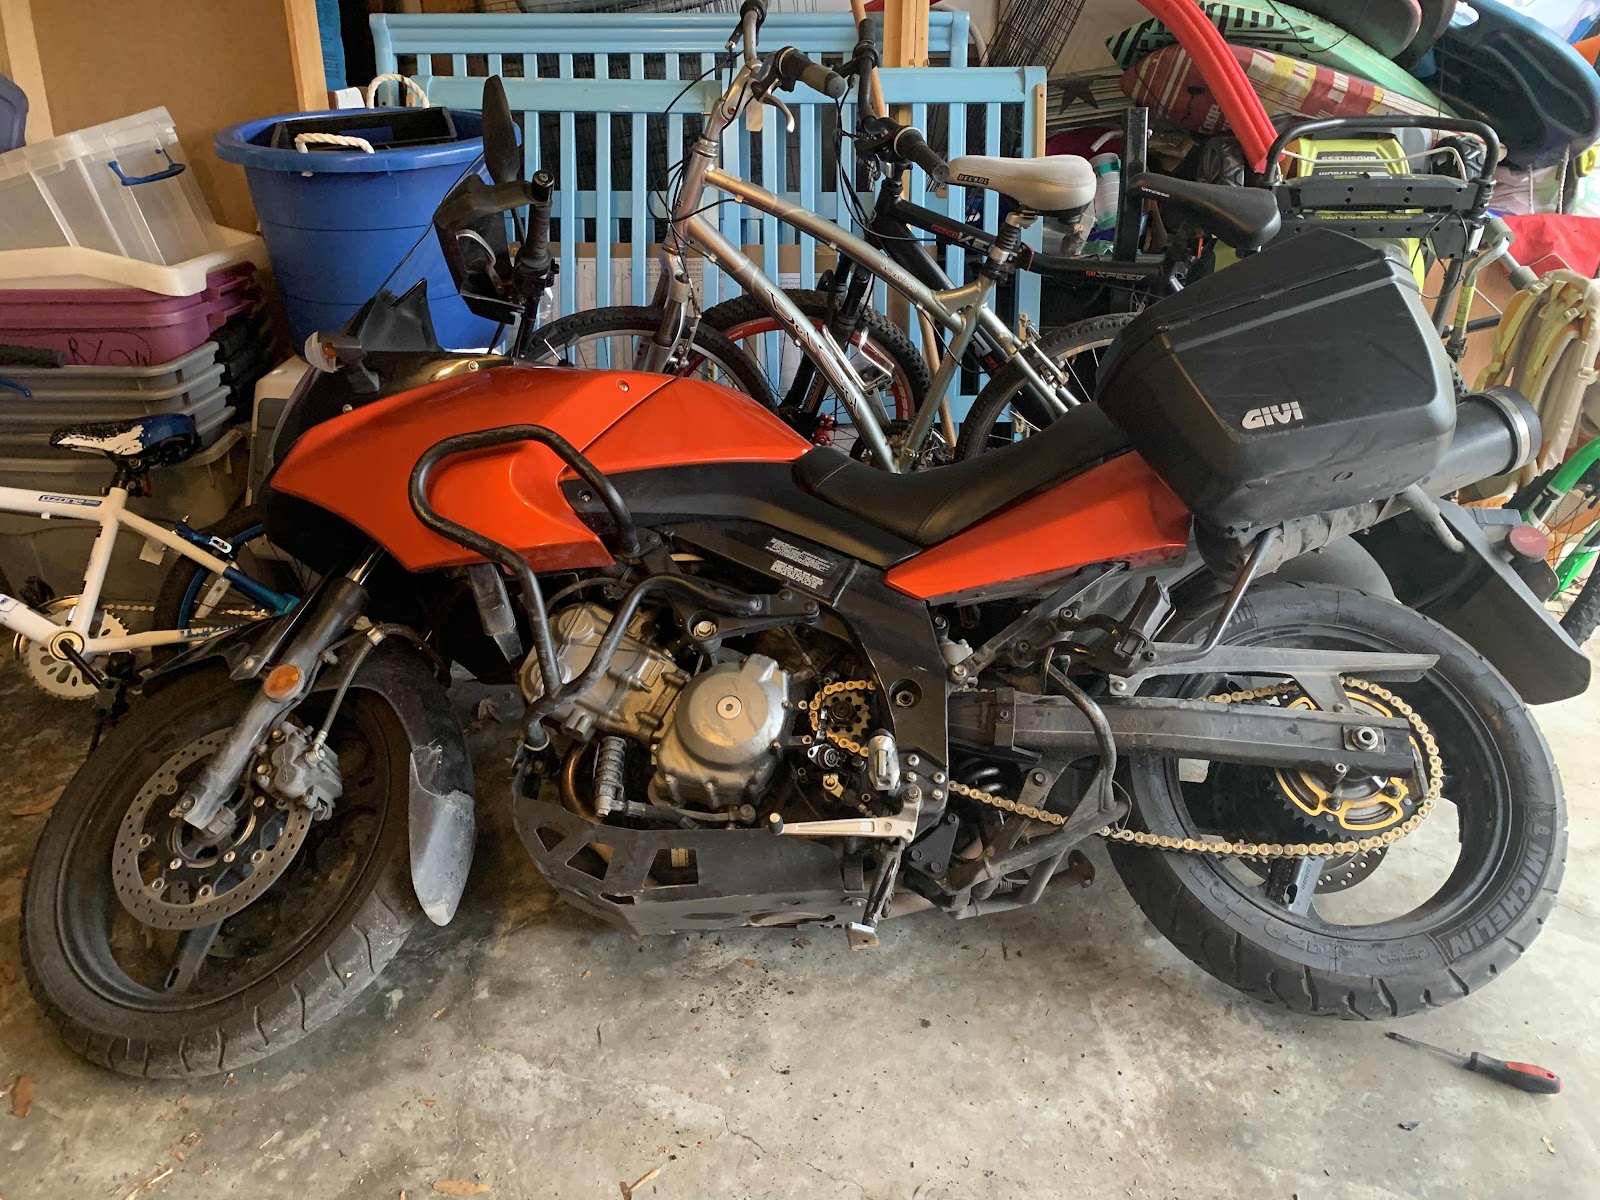
And your bike should look good as new:
Cheers!


Comments
Post a Comment