Posts

Showing posts from 2019

QNA: what’s the deal with Jews and Christmas?

In an attempt to re-start my Adventures in Judaism blog, I’ve decided to start a sort of FAQ series called (drumroll please) Questions Nobody Asked. In other words, questions I’ve been wrestling with that I thought others might be interested in my answers to. (Isn’t that how FAQ lists get generated anyway?) The first question I’d like to tackle is a timely topic: “what’s the deal with Jews and Christmas?” Why has this question been coming up for me lately, you might ask? Well, if you feel the need to ask then I suppose you haven’t been living in America for the past month and a half. There has been the pervasive saturation of the auditory atmosphere with Christmas music that started the day after Halloween. There have been the people wondering out loud on all sorts of social media whether “Merry Christmas” is okay to say as a generic salutation this time of the year. There has been my department’s “Christmas Potluck” that was decorated thoroughly in red and green, tables scattered with
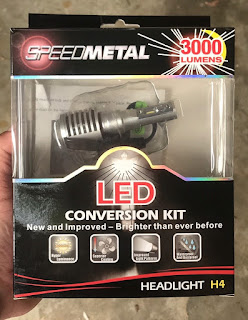
How To: install LED lighting conversion kit

Image
I recently picked up the new and improved version of SpeedMetal’s LED Conversion Kit from Cycle Gear: This is the "new and improved" version -- so new, in fact, that I cannot yet find it on Cycle Gear's web catalog. It is in stores, however, and (for this month at least) is perpetually on sale. As you can see, it promises up to 3000 lumens. I assume this is high beam. Standard H4 headlights, for reference, produce 1650 lumens at high beam and only 1000 lumens low beam. Here is what my bike looked like after installing one of these puppies: The light on your left is the new LED, the light on your right is the old H4 halogen. No comparison, brightness wise.  While the installation was relatively simple, I wanted to post this how-to because it wasn't quite as simple and plug-and-play-and-go as the box promised. So, here goes: Step 1: unplug the H4 (or H7 if that's your bike) connector from the back of your headlight. On a semi-faired bike

Moto Journal: commuting thoughts

As of today, I have been moto-commuting for three whole months. Here are just a few of the many things I think about that: 1. There is simply no more awesome way to get to work in the morning than on a motorcycle. Hands down. As an added plus, the adrenaline fix that comes with dodging the occasional mildly dangerous situation or simply from twisting your throttle wrist on an open stretch of road is a fantastic day-starter for those of us who suffer from ADHD! 2. It’s not as dangerous as everybody made it out to be. I mean, I got cut off by an 18-wheeler who decided to merge across two lanes of traffic all-at-the-same-time once, but I had plenty of time to activate my still-new braking reflexes and avoid a collision or a skid or anything. I dropped the bike once when I was skirting around a traffic jam on a soft shoulder, as one is tempted to do when one rides an adventure bike and there is a traffic jam up ahead. But other than those two times, I have never come anywhere close to my b

Moto Journal: first commute

Image
It was awesome. It was magical. It was invigorating. It was the most nerve-racking twenty minutes of my life to date.  But most amazing of all, it felt totally natural.  I finally felt ready to wrap up all the practicing for a while and actually ride somewhere today. To work. On an honest-to-G-d Houston freeway, at speeds up to about 75mph, with actual other cars going the same damned speed to keep me company.  And this crazy thing happened: I got where I meant to go with no trouble whatsoever. No cars not seeing me and trying to occupy my point in space (point of fact everyone was more than courteous to me in their driving), no crashing or sliding at freeway speeds. No organ donation. Just the most invigorating and pleasant commute to work I’ve ever had. It even felt like it went by faster than in a car, even though I averaged my normal speeds.  Even the curves – bane of my motorcycle existence up to now – seemed to just fly by naturally. I was one with the bike, one with the road, on

How-to: bleed your brakes the non-conventional way

Image
It happens to all of us: you follow the directions in your well-meaning shop manual and they tell you to take apart an assembly you don’t actually need to disassemble right now and before you know it you have air in your brake lines!  What? Doesn’t happen to everybody? Well, it happened to me. And should you, dear reader, find yourself with the dreaded air-in-the-brake-lines such that your brake lever or pedal has no effect whatsoever on your bike’s motion, you’re gonna have to bleed your brakes.  This sounds painful. In point of fact, I found it be a bit of a pain in the you-know-where. But here is an unorthodox approach I worked out by trial and error that might save you some grief… Tools needed:  Screwdriver (in my case Phillips) to open the brake fluid reservoir Box wrench (in my case 8mm) that will fit your bleed valve Assorted rubber tubings and vacuum fittings, available at your auto parts store One “vacuum gun” - essentially a giant steel string that can be used to pull a vacuu

How-to: take the wheels off a 2009 V-Strom 650

Image
It took me just long enough to figure out how to take the wheels off of my 2009 V-Strom 650 that I thought I would write this how-to for my own future benefit and for the benefit of any other new “strom troopers” out there.  Step 1: make sure you have all the tools you will need for this job before you get all greasy and have your bike disabled enough that you can’t ride it to the local auto parts store. (Can you tell that I need this reminder?) Tools shown in most of my photos are the tools that came with the bike, however these were not always adequate and I sometimes needed wrenches with more leverage and tighter tolerances to get the nuts off.  Step 2: put your bike up on the center stand if you have one. If not, find a reasonable alternative to get the back tire off the ground and the bike stable.  Step 3: note the chain tensioner marks on the two swingarms. You will presumably need this information when you reassemble the rear wheel after changing tires or doing whatever other se